Replacing a bathtub faucet is one of those residential maintenance tasks that looks incredibly complicated at first glance, but in almost all residential scenarios, it is a straightforward plumbing task once you map out the hidden connections behind the finished wall.
The critical point many homeowners miss during their first plumbing project is this: you are rarely installing a brand-new internal configuration from scratch. Instead, you are swapping out the visible trim components that attach directly to a fixed plumbing valve body deeply anchored inside your wall.
Data from residential trade audits indicates that localized corrosion and mineral deposits from hard water are responsible for over 70% of bathtub spout and handle failures. When these components scale up, they freeze in place, cause structural dripping, or fail to route water to the showerhead.
This guide walks you through the full replacement process using clear, step-by-step methods so you can safely isolate your water lines, extract the worn components, secure the new trim pieces, and prevent common installation errors that trigger behind-the-wall leaks.
Understanding What You Are Actually Replacing
Before gripping a single tool or purchasing a replacement box at a local supply house, you must clarify how your bathroom water delivery system links together. If you treat the external faucet as an isolated item, you risk twisting the concealed copper or brass supply pipes completely off their internal structural brackets.
Most bathtub faucets connect directly to a hidden plumbing valve assembly inside the wall, a external spout or water outlet, a single handle or multi-handle temperature control cluster, and a diverter valve mechanism that redirects water flow straight up to the showerhead arm.
In almost all DIY projects, your hands-on activities are confined entirely to the visible outer trim pieces rather than the structural supply lines inside the wall. The rough-in valve remains untouched behind the tile or fiberglass enclosure. This structural boundary is why choosing a completely compatible replacement faucet kit matters more than the physical installation process itself.
If the configuration of your new trim kit fails to align with the engineering footprint of the existing inner valve, the system cannot form a watertight seal.
Step 1: Identify Your Faucet Type (Critical Step)
Your very first task is to audit your current bathroom setup to identify its exact engineering style. Failing to perform this visual check results in buying parts that cannot physically connect to your home’s water distribution setup.
Bathtub trim setups generally fall into distinct architectural categories:
- Wall-Mounted Spout: The classic configuration where the water delivery pipe projects horizontally out from the vertical wall surface above the tub rim.
- Deck-Mounted Faucet: A configuration common in whirlpool tubs or custom tile enclosures where the faucet and handles sit horizontally on the flat ledger surface of the tub itself.
- Single-Handle Valve Trim: A modern single-point control system where a single lever manages both the water volume and temperature adjustments simultaneously.
- Two-Handle or Three-Handle Clusters: Legacy layouts where hot and cold water streams require separate dedicated valve controls, occasionally utilizing a central third handle to manually manage the shower diverter.
If you purchase a non-matching design, the new components will not seat against your internal valve assembly. A practical, real-world trick to avoid project delays is to take high-resolution photos of your existing hardware from multiple angles before leaving your home, matching the photos directly to the display models at the hardware store.
Step 2: Turn Off Water Supply
Working on a pressurized plumbing line is a fast way to flood a room and cause thousands of dollars in drywall damage. You must completely isolate the water loop before loosening any retaining hardware.
Locate the main water shut-off valve for your property, which is normally positioned near the water meter, in the basement crawlspace, or within an exterior utility closet. Turn the valve handle clockwise until it stops completely.
Once the main valve is shut, return to the bathroom and open the bathtub faucet handles completely to release the remaining water pressure trapped inside the riser pipes. You will hear a brief burst of air followed by residual drainage, which confirms the line is depressurized. Never skip this diagnostic step, as hidden line pressure can cause loose internal components to shoot out forcefully when the retaining screws are backed out.
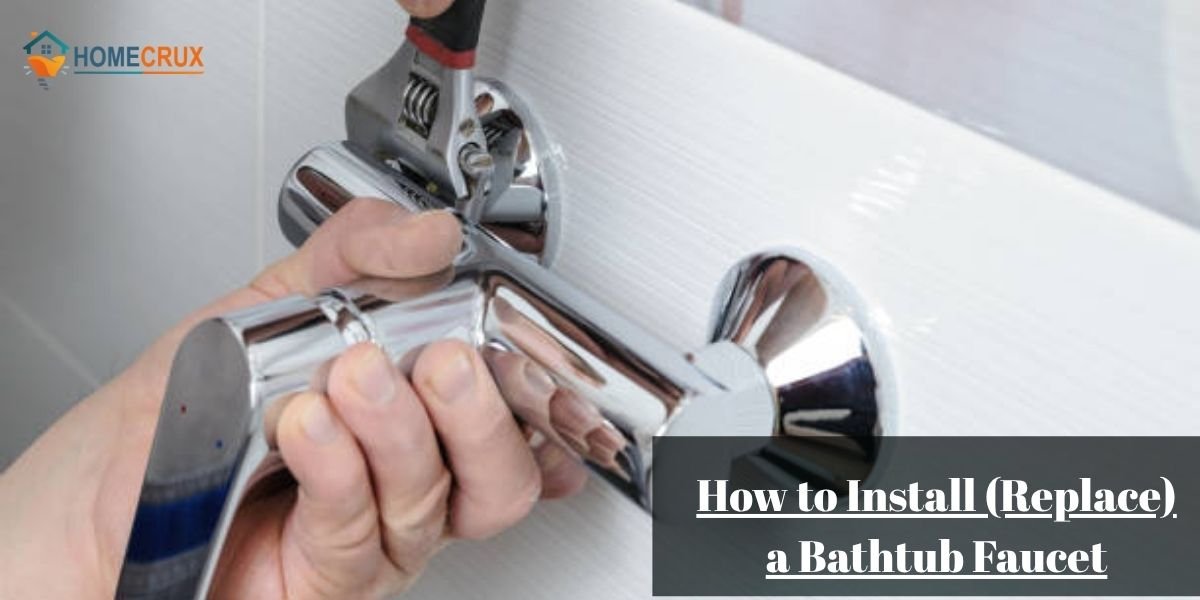
Step 3: Remove the Old Bathtub Faucet
Once the lines are completely depressurized, you can begin removing the old hardware. The exact extraction method depends heavily on whether your components are held in place by mechanical compression screws or direct pipe threads.
To extract the faucet handles, look closely along the underside or front face of the handle to locate a small set screw, which is often hidden behind a plastic decorative index cap marking hot or cold. Pop the cap loose with a thin flathead tool, use a screwdriver or hex key to back out the retaining screw counterclockwise, and pull the handle straight off the grooved valve stem.
To remove the tub spout, check underneath the base near the wall joint to determine its connection style:
- Slip-On Spout: Features a small recessed hex set screw on its underside. Loosen this screw with an Allen wrench, then pull the spout straight off the smooth copper pipe stub.
- Threaded Spout: Contains no set screw and attaches directly to a threaded iron or brass pipe nipple. Grip the spout firmly and rotate the entire assembly counterclockwise to unscrew it from the wall.
If the old metal components feel entirely stuck due to calcification, do not yank or hammer them aggressively. Applying heavy, unguided force can bend or break the underlying copper lines inside the wall space. Instead, apply a steady, rhythmic back-and-forth twisting pressure while pulling outward to gradually break the internal mineral bond.
Step 4: Clean the Pipe Connection
Once you pull the old trim off, you will likely find a layer of corroded pipe threads, calcified minerals, and old crumbling thread sealant. Leaving this debris in place guarantees your new hardware will leak, regardless of how tightly you fasten it.
Take a stiff wire brush or fine steel wool and scrub the exposed pipe stub thoroughly to remove all traces of old plumber’s tape, joint compound, and rust. Wipe the bare metal completely dry with a clean shop rag. Cleaning the pipe to a smooth finish ensures that your new seals can sit perfectly flat against the plumbing connection, eliminating tiny gaps where pressurized water could trickle past.
Step 5: Prepare the New Bathtub Faucet
Before opening your thread sealants, place the new faucet trim pieces loosely over the wall pipes to confirm that the lengths match your existing setup perfectly.
Wrap high-density plumber’s tape (Teflon tape) clockwise around the exposed male pipe threads, applying three to four tight wraps to ensure the tape deforms neatly into the thread valleys. If your new spout kit requires a slip-on installation, check that the internal rubber O-ring is seated squarely inside its machined groove and apply a thin film of silicone plumbing grease to allow the pipe stub to slide in smoothly.
Treat this phase exactly like prepping high-precision connectors before plugging in an electronic device; proper alignment and clean mating surfaces determine the long-term reliability of the system.
Step 6: Install the New Faucet
With the pipe connections completely cleaned and prepped, you can begin the mechanical installation of the new trim components. The process must be executed with steady, controlled torque to avoid cross-threading the delicate brass or plastic components.
If you are installing a threaded spout, align the piece perfectly perpendicular to the vertical wall face. Begin spinning the spout clockwise onto the treated pipe nipple by hand, ensuring the internal threads catch smoothly without binding.
Once hand-tight, wrap a thick rag around the finished body of the spout, grip it gently with a smooth-jaw strap wrench, and rotate it until the water outlet points straight down at a precise 90-degree angle to the tub rim.
If you are dealing with a slip-on spout, push the assembly smoothly over the bare copper pipe stub until the rear margin sits flush against your tile or fiberglass wall. Reach underneath with an Allen key and tighten the recessed hex set screw firmly against the underside of the copper pipe.
To install the new handle assemblies, slide the decorative escutcheon plates or sleeve covers over the exposed valve stems sticking out from the wall. Push the new handles directly onto the splined teeth of the valve stems, keeping them oriented in their proper off positions. Insert the internal retaining screws, tighten them snugly using a screwdriver, and snap the cosmetic hot, cold, or brand index caps into place over the screw holes.
Installation Rule: Secure tight fittings are mandatory to prevent operational shifting, but over-tightening will inevitably crack plastic decorative trim rings, strip soft brass threads, or crush internal rubber seals.
Step 7: Turn Water Back On and Test
Do not pack away your tools or apply permanent silicone caulk around the wall joints until the entire system has been fully pressurized and monitored under live operational conditions.
Walk back to your main water shut-off valve and rotate the handle slowly counterclockwise to reintroduce water pressure into the residential plumbing lines. Returning water pressure gradually prevents sudden hydraulic shock waves (water hammer) from rattling your internal pipe brackets or bursting older weak joints down the line.
Once the main line is fully active, return to the bathroom and perform a systematic inspection:
- Run the cold line for 60 seconds, then transition to full hot, checking that the handle stops rotate smoothly without catching or grinding.
- Use a high-intensity flashlight to inspect the micro-gap between the back of the spout and the wall panel, watching for subtle beads of water pushing out from the internal pipe connection.
- Look closely around the base of the handle stems and escutcheon rings to confirm no water is bypassing the internal valve packings.
- Engage the shower diverter mechanism for at least two minutes, verifying that water reroutes cleanly to the overhead shower arm without excessive residual bypass drainage dropping out of the main tub spout.
Step 8: Fix Minor Issues (If Needed)
If your initial test reveal minor installation errors, they can usually be corrected immediately without scrapping the entire project or starting from scratch.
If you observe a slow, persistent drip coming directly out of the front mouth of the new spout when the handles are turned completely off, the issue lies within the internal valve cartridges or washers rather than the spout itself. You must isolate the water again, pull the handle off, and verify that the internal valve stem or cartridge is screwed tightly into the main valve body.
If water leaks backward out of the rear seam where the spout meets the wall tile, the underlying connection is compromised. Pull the spout back off, clean away the compressed tape layer completely, inspect the copper or iron threads for hairline cracks, reapply a slightly thicker layer of high-density Teflon tape, and re-torque the spout onto the nipple.
See Also: How to Fix a Leaky Faucet: Complete DIY Faucet Repair Guide for Dripping Faucets
Common Mistakes Beginners May Face (and How to Fix Them)
Most amateur plumbing failures do not stem from a lack of physical coordination or manual skill. Instead, they happen because homeowners rush past critical preparation protocols or fail to notice hidden material mismatches.
The most frequent project errors include:
- Stripping the Hex Set Screw: Forcing a non-matching Imperial hex key into a metric slip-on spout screw strips the internal socket, making it impossible to tighten or remove. Always verify a snug tool fit before applying torque.
- Failing to Clear Internal Debris: Loosening old pipes dislodges hard mineral scale inside the line. If you install the new components without flushing the open pipe stubs first, that loose debris will lodge directly inside your new valve seats, causing immediate internal leaks.
- Twisting the Concealed Drop-Ear Elbow: When a threaded spout is fused to a pipe nipple by years of corrosion, pulling on it with a massive pipe wrench without supporting the pipe can break the solder joints inside the wall frame. Always use steady, calculated counter-pressure.
In What Cases You May Need to Call a Plumber?
While updating cosmetic trim is an accessible project for standard residential properties, certain structural complications require the diagnostic tools and legal liability coverage of a licensed master plumber.
You must immediately halt work and contact a plumbing professional if you discover that the copper pipe stub extending from the wall has corroded to a paper-thin thickness or cracked inside the wall cavity during removal.
You must also call a professional if the internal rough-in valve body behind the tiles is dripping continuously from its welded joint connections, or if your home uses legacy lead or outdated polybutylene plumbing lines that require specialized transition fittings to interface safely with modern hardware.
Attempting to force retail DIY kits onto structurally compromised or obsolete piping will inevitably trigger major hidden water damage behind your finished bathroom walls.
Frequently Asked Questions (FAQs)
How to install a bathtub faucet correctly?
To install a bathtub faucet correctly, you must isolate the main water line, completely remove the old trim, scrub the exposed copper or iron pipe connection free of old sealants, apply fresh high-density Teflon tape to the threads, and thread or slip the new component onto the pipe stub without over-tightening the mechanical fittings.
How to replace a bathtub faucet without a plumber?
Most standard residential tub faucets can be replaced without a plumber by using basic home hand tools, including an adjustable wrench, an Allen key set, a flathead screwdriver, and fresh plumber’s tape. This remains true as long as the primary rough-in valve securely anchored behind the finished wall is intact and free of structural corrosion.
Can I replace a tub faucet myself?
Yes, replacing a tub faucet is a highly manageable DIY project for homeowners. The entire process generally consists of backing out external retention screws, removing old mineral deposits, and aligning the new cosmetic trim to the preexisting plumbing footprint.
Why is my new bathtub faucet leaking?
A newly installed faucet typically leaks because the internal threads were cross-threaded during installation, the plumber’s tape was wrapped in the wrong direction or skipped entirely, or the slip-on internal rubber O-ring was pinched or torn as it slid over a rough copper pipe edge.
How long does it take to replace a bathtub faucet?
For a beginner working carefully, the entire replacement project takes between 30 minutes and two hours. The final timeline depends mostly on how easily the old hardware breaks free from local hard water mineral deposits and how much pipe cleaning is required before the new trim can be safely mounted.
What is the most common mistake when replacing a bathtub faucet?
The most frequent mistake is purchasing a replacement trim kit that is completely incompatible with the brand or mechanical style of the old internal valve body, followed closely by over-tightening components and cracking the internal fittings.