A dripping faucet is a silent thief of both natural resources and household finances. According to data from the Environmental Protection Agency (EPA), a single persistent leak can waste more than 3,000 gallons of water annually. This volume of waste is not merely an environmental concern but a direct financial drain that manifests on every monthly utility statement.
Repairing a faucet is a fundamental maintenance skill that rewards patience over technical brute force. Most homeowners can resolve these issues without the expense of a professional plumber by simply understanding the specific mechanics of their hardware. This guide provides the diagnostic precision needed to return your plumbing to peak efficiency.
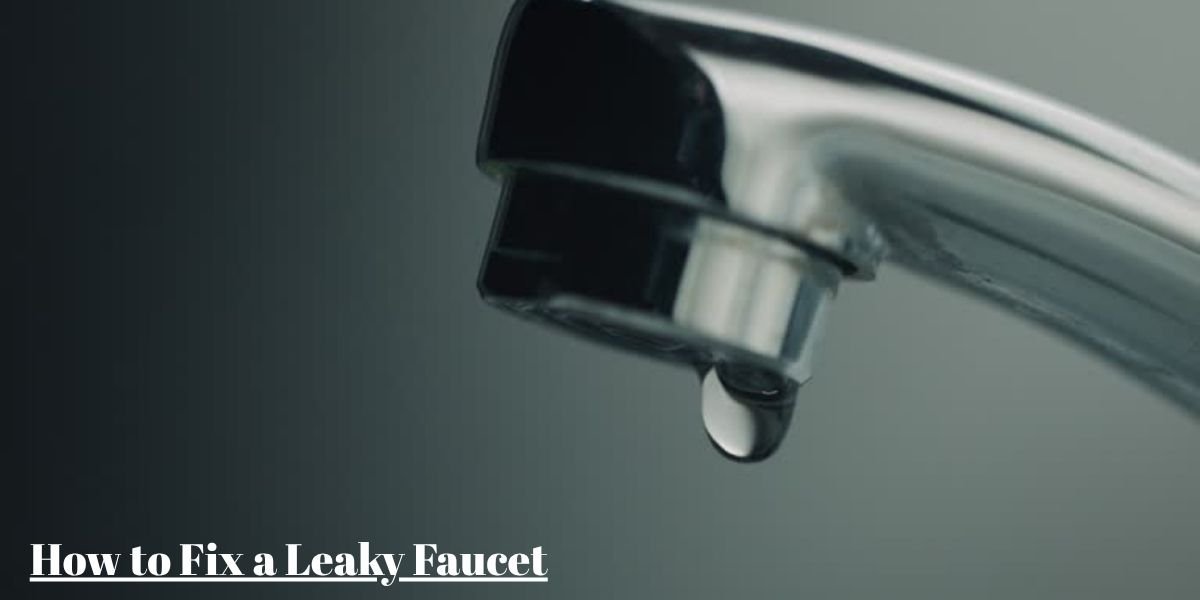
How to Identify Where the Faucet Leak Is Coming From
Accurate diagnosis is the most critical phase of any plumbing project. Misidentifying the source of the water leads to unnecessary spending on parts that do not require replacement. You must observe the faucet under pressure to pinpoint the failure.
Faucet Drips From the Spout
When water escapes from the tip of the spout while the handle is in the off position, the internal seal has failed. In older models, this is almost always a compressed rubber washer. In modern fixtures, the cartridge or ceramic disc has likely accumulated mineral scale or developed a structural hairline crack.
Water Leaks Around the Handle
Moisture pooling at the base of the handle indicates a failure in the O-ring or the packing nut. This area is designed to be watertight while the stem moves. If tightening the packing nut does not stop the seepage, the rubber seal has lost its elasticity and requires an immediate swap.
Leak Under the Sink
Do not assume a puddle in the cabinet is coming from the faucet above. Often, this is a result of a loose supply line or a corroded shut-off valve. Use a dry paper towel to wipe down the braided stainless steel lines. If the towel comes away wet near the top, the connection to the faucet shank is loose and requires tightening with a basin wrench.
Intermittent vs Constant Dripping
A steady, rhythmic drip indicates a physical gap in a seal. If the dripping is inconsistent, your home might be experiencing high water pressure spikes. Pressures exceeding 80 psi can force water past even healthy seals, indicating you may need a pressure-reducing valve rather than a new faucet part.
Tools and Parts You May Need
Having the correct kit prevents mid-job frustration and trips back to the hardware store. Plumbing components are highly specific, and using generic tools often causes more harm to the finish of the fixture.
You will typically need the following items for most repairs:
- An adjustable wrench or a dedicated basin wrench for tight spaces.
- Phillips and flathead screwdrivers for handle removal.
- An Allen wrench set, specifically for the small set screws found in single-handle designs.
- Needle-nose pliers to extract small springs and rubber seats.
- Plumber’s grease which is silicone-based to lubricate new rubber parts.
- Plumber’s tape for threaded connections.
Before purchasing replacement parts, take the old components to the store. A one quarter inch washer is not the same as a one quarter inch Large washer. Precision is mandatory for a watertight seal.
Turn Off the Water Supply Before Starting
You must isolate the faucet before loosening any nuts to avoid accidental flooding. Look for the silver or plastic oval handles located under the sink. Turn them clockwise until they stop completely.
If your shut-off valves are stuck due to corrosion, do not force them with a wrench as they might snap. In this case, you must turn off the main water valve for the entire house.
Once the water is off, open the faucet handles to drain the remaining water in the neck and relieve internal pressure. If you skip this, a small geyser will occur the moment you loosen the internal cartridge. It is also wise to cover the drain with a rag. There is nothing more frustrating than watching a specialized brass screw disappear down the P-trap.
Identify Your Faucet Type Before Repairing It
You cannot apply a one size fits all repair method to modern plumbing. Identification is based on the movement of the handle and the internal mechanics.
Compression Faucet
These are common in older homes and have two distinct handles. When you turn them off, you feel a physical squeeze as the rubber washer is compressed against the valve seat. They rely on mechanical pressure to stop water flow and are the most frequent type to develop leaks due to washer wear.
Cartridge Faucet
These can have one or two handles and provide smooth, consistent movement. Unlike compression types, they do not require tightening to stay closed. The cartridge is a plastic or brass cylinder that slides out of the faucet body as a single unit.
Ball Faucet
Common in kitchens, these feature a single lever that rotates over a rounded, dome-shaped cap. Inside, a slotted metal or plastic ball controls the mix of hot and cold water. These are notorious for having many small parts like springs and rubber seats that eventually lose tension.
Ceramic Disk Faucet
This is the high-end standard for modern plumbing. The handle moves a single lever over a wide, cylindrical body. Inside, two highly polished ceramic discs slide against each other. They are nearly indestructible unless sand or grit gets between the plates and scratches the surface.
How to Fix a Dripping Compression Faucet
This is the most frequent repair for traditional setups. The rubber components in these faucets are designed to wear out over time and are easily replaced.
Replace the Washer
After removing the handle, use a wrench to unscrew the packing nut and pull the entire stem out. At the base of the stem, a small screw holds the seat washer in place. Remove the screw, swap the washer for an identical rubber disc, and apply a thin layer of plumber’s grease to prolong its life.
Inspect the Valve Seat
The washer presses against the valve seat to stop water. If you replace the washer but the faucet still drips, the seat is likely pitted or scored by mineral deposits. You can use a seat dresser tool to smooth it out or replace the seat entirely using a seat wrench if it is a removable model.
Replace the O-Ring
If your leak was at the handle, look further up the stem for one or two small rubber O-rings. If they appear flat or cracked, they will not hold back the pressure. Roll them off and slide on new ones coated in grease to ensure a smooth and watertight fit within the faucet body.
Faucet Parts Explained for Beginners
To communicate effectively with hardware store staff, you should understand these technical terms.
- Cartridge: The internal component that regulates volume and temperature.
- Stem: The moving vertical part in compression faucets that carries the washer.
- Aerator: The mesh screen at the end of the spout that prevents splashing.
- Packing Nut: The large nut that secures the internal components within the faucet body.
- Valve Seat: The stationary orifice that the washer seals against to stop water flow.
Ceramic Disk Faucet Repair
Ceramic disk faucets are engineered for extreme longevity, utilizing two diamond-hard plates to shear off the water flow. While these components rarely wear out from friction, they are highly sensitive to mineral buildup and debris.
Clean the Ceramic Disks
If a ceramic faucet develops a drip, it is usually because a grain of sand or a mineral deposit is trapped between the disks. You must remove the handle and the decorative escutcheon to access the disk cylinder.
Once the cylinder is extracted, inspect the bottom openings. Use a soft cloth and white vinegar to wipe away any calcium buildup. Avoid using abrasive pads, as scratching the ceramic surface will create a permanent leak path that cannot be repaired.
Replace Cracked Components
If cleaning does not stop the drip, inspect the disks under a bright light for hairline fractures. Thermal shock from extremely hot water or physical impact can crack these plates. Because the disks are matched sets, you cannot replace just one. You must install a new disk cartridge to restore the seal.
How to Remove a Faucet Handle
The most common hurdle in any repair is simply getting the handle off. Over time, mineral corrosion acts like a natural adhesive, bonding the metal handle to the internal stem.
Handle With a Hidden Set Screw
Look for a small hole at the base or back of the handle. Many modern designs hide an Allen screw here. You will need a metric or standard hex key to loosen it. You do not always need to remove the screw entirely. Loosening it halfway is often enough to slide the handle off the stem.
Stuck Faucet Handle Removal Tips
If the handle is seized, do not use a hammer, as the impact can shatter the internal brass valve. Use these methods instead:
- Apply penetrating oil or a specialized calcium-dissolving solution around the seam.
- Allow the lubricant to sit for at least 20 minutes to break the chemical bond of the minerals.
- Gently toggle the handle back and forth to break the seal of the deposits.
- Use a faucet handle puller if manual force fails. This tool applies even upward pressure without risking damage to the sink or the faucet body.
How to Reassemble the Faucet Correctly
A successful repair can be ruined by improper reassembly. The goal is to achieve a snug fit without damaging the new, soft rubber components.
Lubrication and Alignment
Always apply a thin coating of silicone-based plumber’s grease to every O-ring and rubber seal. This prevents the rubber from binding or tearing as you tighten the packing nut.
Observe the orientation of the cartridge carefully. Many have a small notched tab that must align with a specific slot in the faucet body. If forced in incorrectly, the handle will not operate, or your hot and cold water supplies will be reversed.
Tightening Protocols
Avoid the urge to overtighten. For most internal nuts, hand-tight plus a quarter turn with a wrench is sufficient. Overtightening can crush new rubber washers or strip the fine threads on brass components, leading to a much more expensive replacement project.
Troubleshooting a Faucet That Still Leaks
If you have replaced the internal parts and the drip persists, the problem is likely structural rather than a simple seal failure.
Damaged Valve Seat
In compression faucets, the valve seat is the metal surface the washer presses against. If this surface is uneven, a new washer cannot create a seal. Use a seat wrench to remove the old seat and install a fresh one. If the seat is non-removable, use a seat dresser to grind the surface back to a smooth, flat finish.
Low Water Pressure After Repair
If the water flow seems weak after you turn the supply back on, check the aerator. Debris often breaks loose during the repair process and clogs the fine mesh at the tip of the spout. Unscrew the aerator and rinse the screen under high pressure to restore flow.
When a Faucet Cannot Be Repaired
There is a point where labor and parts costs outweigh the benefit of keeping an old fixture. Recognizing these signs saves you from wasting time on a failing unit.
Cracked Faucet Body
If you see water weeping directly through the metal walls of the faucet, the internal casting has failed. This is common in low-quality fixtures or those subjected to hard water for decades. No amount of epoxy or tape will permanently fix a cracked valve body.
Severe Internal Corrosion
When you remove the cartridge and find the internal brass looks like it is melting or has deep green pitting, the metal is structurally compromised. New parts will not seat properly in a corroded housing, and the leak will likely return within weeks.
Tips to Prevent Future Faucet Leaks
Maintaining your plumbing extends the life of your seals and saves hundreds of dollars over the life of the fixture.
- Operate Handles Gently: Do not crank the handle to shut off the water. If you have to force it to stop the drip, the washer has already failed.
- Monitor Water Pressure: Ensure your home’s pressure is between 40 and 60 psi. High pressure is the leading cause of premature O-ring failure.
- Softener Maintenance: If you have hard water, maintain your water softener. Calcium buildup acts like sandpaper on ceramic disks and rubber seals.
Critical Trust Signals for DIY Plumbing
Success in home repair relies on knowing your limits and respecting the physics of pressurized water. While most leaks are manageable, you should contact a licensed plumber if the leak is originating from behind the wall or if the brass supply nuts are so corroded they risk snapping.
Always prioritize OEM (Original Equipment Manufacturer) parts over universal kits. While universal kits are cheaper, the tolerances in ceramic and cartridge faucets are measured in microns. A slightly off-brand cartridge can cause water hammer, a loud banging noise in your pipes that eventually damages your entire plumbing system.
Frequently Asked Questions
How do I know what type of faucet I have?
The most reliable indicator is the movement of the handle. If you have two separate handles that require a firm twist to close, it is a compression model. A single lever that moves in a smooth, multi-directional arc over a dome is a ball faucet. If that single lever lifts and rotates on a solid cylindrical base, it is likely a ceramic disk or cartridge.
Can I fix a leaky faucet without turning off the main water supply?
You can, provided the local shut-off valves under your sink are functional. These valves allow you to isolate the specific sink without affecting the rest of the house. However, if those valves leak or won’t turn, you must use the main water shut-off usually located near your water meter or where the main line enters the home.
How long does a faucet repair take?
For a beginner, a standard cartridge replacement takes about 30 to 45 minutes. A ball faucet repair usually takes closer to an hour because of the multiple small springs and seats that require careful alignment.
Why does my faucet drip only at night?
This is a common phenomenon tied to municipal water pressure. During the day, neighborhood water usage is high, which keeps pressure lower. At night, when usage stops, the pressure in the lines increases. If your internal seals are weak, this nocturnal pressure spike forces water past the seals. Replacing the seals or installing a pressure-reducing valve (PRV) is the standard fix.