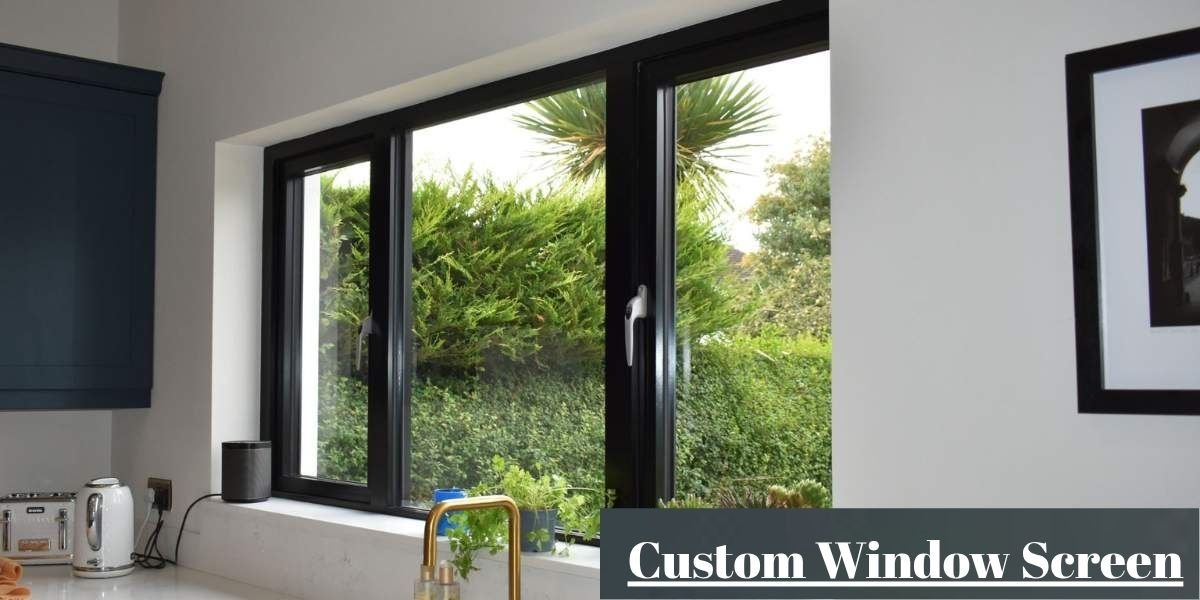
Building a custom window screen gives you complete control over the fit, durability, and visibility of your home ventilation. Factory window screens often warp, tear, or fit poorly inside the window track over time. Assembling your own screen using individual aluminum frame stock, corner keys, spline, and specialized mesh ensures an airtight barrier against insects while preserving your view.
Understanding the relationship between frame dimensions, mesh thickness, and spline gauge is essential before cutting any metal. A fraction of an inch error in cutting aluminum frame channels can lead to frame bow, loose mesh, or a screen that binds inside the window pocket. Following exact measurement deductions and proper spline rolling techniques eliminates these structural failures.
Start With the Right Screen Frame System
Why not every window screen frame is the same
Screen frames are manufactured out of roll-formed aluminum or extruded aluminum, available in various profile thicknesses and depth channels. The most common standard depths for residential windows are 5/16 inch, 3/8 inch, and 7/16 inch.
Using the incorrect frame thickness prevents the screen from sliding smoothly into the window casing tracks or engaging the retention clips properly. Thin vinyl frame components flex under the tension of rolled mesh, while heavy aluminum extrusions require specific corner insert connectors to maintain a rigid rectangular shape.
Understanding frame profiles before buying materials
Frame profiles feature a hollow chamber paired with an open spline channel running along one edge. The width of this channel dictates which rubber or vinyl spline diameter you must use to secure the mesh.
Standard aluminum screen channels accommodate spline diameters ranging from 0.125 inch to 0.160 inch. Beyond depth and channel width, some profiles incorporate an extended lip or flange designed to seal exterior gaps along old wood double hung window frames.
When a universal frame kit works, and when it doesn’t
Pre-packaged universal screen frame kits work well for standard rectangular window openings under 36 inches wide by 48 inches tall. These boxed kits include four pre-cut or trim-to-size frame pieces, matching plastic corner keys, a length of spline, and standard fiberglass mesh.
Universal kits fail when outfitting larger custom windows, patio pass-throughs, or openings requiring specialized heavy-duty screen fabric. Heavy screen mesh like pet-resistant vinyl-coated polyester exerts massive inward pull on light frame stock, causing the middle of the frame sides to bow inward. For openings exceeding 3 feet in any dimension, sourcing individual commercial-grade roll-formed aluminum frame stock at 0.020 inch or 0.025 inch gauge thickness provides necessary rigidity.
Gather Your Tools and Materials Before You Begin
Before assembling your custom window screen, assemble these tools and hardware components to complete the project without interruption:
Essential Tools
- Hacksaw or miter saw with a fine-tooth metal cutting blade (32 teeth per inch recommended for clean aluminum cuts)
- Screen rolling tool equipped with both concave and convex steel wheels
- Measuring tape with clear 1/16 inch increment markings
- Utility knife fitted with a fresh, sharp heavy-duty razor blade
- Corner square or Carpenter square for verifying 90-degree alignment
- Metal file or emery board to deburr freshly cut aluminum edges
- Painter tape to hold frame members square during assembly
Screen Frame Components
- Aluminum frame stock matching your window channel thickness (5/16 inch, 3/8 inch, or 7/16 inch)
- Square cut plastic or aluminum corner keys matching your frame profile
- Vinyl serrated spline matched to frame groove and mesh type
- Screen mesh fabric cut 2 inches wider and longer than total frame dimensions
- Spring clips or pull tabs for frame tension and removal control
Choosing the Right Screen Mesh for Your Home
Select screen fabric based on insect pressure, sun exposure, durability needs, and airflow preference:
Fiberglass
Standard fiberglass mesh is the most popular choice for modern home screens due to its affordability, flexibility, and resistance to denting. The standard weave pattern is 18×16 mesh count, meaning 18 vertical threads and 16 horizontal threads per square inch. Fiberglass does not crease easily during installation and will not rust when exposed to moisture. It provides excellent visibility while blocking standard insects, though it can tear if claws or sharp debris strike it.
Aluminum
Aluminum mesh offers superior durability and structural stiffness compared to synthetic weaves. Available in silver, charcoal, or black protective finishes, aluminum screening prevents sagging over wide window spans. Black and charcoal finishes absorb light and reduce glare far better than natural mill-finish aluminum. Installing aluminum screening requires steady, light pressure with a rolling tool, as excessive force can crease or cut the wire strands along the spline channel.
Pet-resistant mesh
Pet-resistant screen fabric is constructed from heavy-duty vinyl-coated polyester yarn that is up to 7 times stronger than standard fiberglass. Designed to withstand clawing dogs, cats, and wildlife, this thick weave prevents tears and punctures entirely. Because the individual threads are considerably thicker, pet screen reduces outdoor airflow and light transmission slightly. You must also step down one size in spline diameter (such as moving from 0.140 inch down to 0.125 inch) to account for the extra fabric thickness entering the spline groove.
Solar screen fabric (when appropriate)
Solar screening uses specially woven synthetic fibers to block between 70% and 90% of solar heat gain and ultraviolet rays before sunlight enters your glass. By filtering intense sunlight, solar screens protect interior furnishings from fading while dropping indoor cooling costs. Like pet screens, solar fabric is noticeably thicker than standard fiberglass, necessitating smaller spline sizes and rigid frame profiles to prevent frame collapse under high spline pressure.
Measure the Window Opening the Right Way
Where to measure
Measure directly inside the window frame channel where the screen sits, rather than measuring an old worn-out screen that may have warped or shrunk.
For windows with built-in screen tracks, measure from the inside bottom of the deepest receiving channel to the inside edge of the opposite retaining lip. For flat face-mount windows with turn buttons or blind stop channels, measure the full clear opening where the frame must rest.
Measuring width and height accurately
Take three separate horizontal measurements for width at the top, middle, and bottom of the frame pocket. Then take three vertical measurements for height at the left edge, center, and right edge.
Record the smallest measurement among the three for both width and height. Windows are rarely perfectly square, and relying on the smallest dimension keeps your final assembled frame from binding inside narrowed sections of the window casing.
How frame thickness affects final dimensions
When assembling a frame using external plastic corner keys, the corner inserts add physical length to the final frame structure. Square-cut corner keys typically add 1/2 inch to 3/4 inch total to each dimension, split between the two opposite corners.
Subtract the combined width of the corner key shoulder exposures from your target length before cutting. The exact deduction varies by corner style and frame brand, so confirm it against your specific parts first.
For example, on a 24-inch-wide opening where each corner key shoulder measures 1/4 inch (1/2 inch total) and you allow no clearance, your raw cut length lands at 23.5 inches. Most builders add a small clearance on top of that, which the next section covers.
Double-checking before cutting
Verify all deductions on paper before placing a blade against your aluminum frame stock. Calculate each cut using this structural relationship:
Aluminum Cut Length = Total Window Pocket Dimension – Deduction Allowance
The standard deduction allowance combines 1/8 inch of clearance space for window track fit with the total corner key exposure width. Because corner styles differ, dry-fit two rails and a corner key before cutting all four pieces, so you can confirm the real-world deduction for your hardware.
Cut the Frame Pieces to Size
Accounting for corner connectors
Lay out your four aluminum frame pieces on a flat surface with the spline channels facing inward toward one another. Double-check whether you are using square corner keys or mitered metal corner keys.
Square corner keys require 90-degree straight cuts on the aluminum stock. Mitered corner inserts require 45-degree angled miter cuts on each end of the frame stock.
Tips for making clean, square cuts
Secure your frame stock firmly inside a wooden miter box or clamping jig using painter’s tape, which stops the thin aluminum from rolling during the cut. Draw your cut line clearly with a fine-point permanent marker along a speed square.
Use smooth, full-length strokes with a fine-tooth hacksaw, letting the weight of the saw do the work without crushing the fragile channel walls. Afterward, run a metal file or emery board over the fresh cut edges inside and outside the channel. Removing all burrs keeps jagged edges from splitting plastic corner keys or cutting your hands.
Avoiding common cutting mistakes
A few repeat mistakes cause most failed cuts:
- Cutting frame pieces without accounting for corner key shoulder extensions
- Squeezing the aluminum channel closed with heavy hand clamps
- Cutting the spline groove on the wrong side of opposite frame members
- Ignoring rough metal burrs that keep corner keys from seating fully
Assemble the Screen Frame
Installing the corner inserts
Insert the square plastic or metal corner keys into the hollow ends of the short frame pieces first. Tap them gently with a rubber mallet or block of wood until each corner key shoulder sits flush against the cut end of the aluminum. Align the long pieces so their spline grooves face the same direction as the short ones, then press the exposed corner key ends into the long members to complete the outer rectangle.
Checking for square before moving on
Lay the assembled empty frame flat on a level surface. Measure diagonally from the top-left corner to the bottom-right corner, then from the top-right corner to the bottom-left corner. If both diagonals match within 1/16 inch, the frame is square. If they differ, gently push against the longer diagonal corners until both measurements align.
When a center support bar is necessary
For screens that exceed 36 inches in width or height, an aluminum crossbar support is essential to maintain structural integrity, because the inward pull of stretched mesh bows unbraced rails inward at the midpoint. Slide crossbar clips into the inner side channels at the midpoint, then snap a pre-cut aluminum crossbar into position. The crossbar keeps the parallel sides straight when you roll spline under tension.
Install the Screen Mesh Without Wrinkles
Positioning the mesh correctly
Roll out your chosen fabric over the assembled frame so it overlaps all four outer edges by at least 1 inch to 2 inches, then trim it loosely from the master roll with your utility knife. Secure the mesh temporarily along the top and bottom rails with small strips of painter tape or spring clamps to hold the weave square with the metal edges.
Rolling the spline into the groove
Start rolling at one corner with your screen rolling tool. On a dual-wheel tool, run the convex wheel lightly over the mesh first to pre-tuck the fabric into the groove. Then place your vinyl spline over the pre-tucked channel and press it in with the concave wheel. Keep firm, continuous forward pressure at a slight 45-degree downward angle, pushing the spline past the channel lip without overstretching the cord.
Keeping even tension across the frame
Work in a logical, continuous path around the frame perimeter:
- Roll the complete top edge first without pulling on the bottom mesh
- Roll down the right side, using your non-dominant hand to apply light outward pressure on the fabric
- Roll across the bottom edge while pulling the screen smooth toward you
- Finish along the left side, checking constantly for surface ripples or hourglass bowing
Do not yank or aggressively pull the mesh while rolling. The action of pressing the spline wheel into the groove automatically draws the fabric tight across the open center.
Trimming excess mesh cleanly
After the spline is fully seated around all four corners, inspect the screen face for loose waves or frame distortion. Hold a fresh, sharp utility knife blade at a 45-degree angle pointed toward the outer rim of the frame channel, away from the finished center surface.
Guide the blade smoothly along the outer top wall of the spline groove, slicing the excess material right above the spline cord. The outward angle prevents accidental cuts into the main screen surface or the spline cord itself.
Test the Fit Before Installing the Screen
Checking for binding
Carry your assembled screen to the window and check how smoothly it seats into the outer tracks. The frame should slide into position without heavy force or twisting. If it binds along the sides, inspect the corners to make sure the corner key joints are fully seated and flush against the cut aluminum ends.
Confirming a snug but removable fit
A properly sized window screen should sit square inside the window pocket with roughly 1/16 inch to 1/8 inch of total clearance play. This small gap leaves enough room to tilt or lift the screen out of the track for cleaning and winter storage without scratching the window frame casing paint.
Small adjustments if the frame feels loose
If the screen fits loosely and rattles in wind, install small stainless steel tension springs or leaf springs into the side channel. Two leaf springs on the top rail or left vertical rail push the screen firmly against the opposite solid channel, holding it motionless inside the pocket.
Install the Finished Screen in the Window
Using pull tabs
Pull tabs make removing screen frames easy during cleaning or seasonal maintenance. Slide plastic or vinyl pull tabs into the spline channel along the bottom frame edge before rolling the spline into place. Position two tabs spaced 4 to 6 inches in from the bottom corners, with the flexible portion extending toward the room interior so you can grasp them when the window is open.
Installing tension springs or clips if required
Depending on your window manufacturer, screens are held in place using specific hardware:
- Tension springs: Curved metal springs mounted inside the top frame groove that compress when you lift the screen into the upper track
- Turn buttons: Swiveling plastic or metal clips mounted on exterior wood window casings that turn over the edge of the frame
- Knife latches: Spring-loaded pins installed through holes drilled into the screen frame sides that slide directly into receiver holes in the window jamb
Verifying the screen sits securely
Grasp the frame firmly near the bottom corners and push lightly outward. It should stay seated within its tracks without flexing or dislodging from the hardware. Confirm no gaps larger than 1/16 inch exist between the outer frame edge and the window jamb, which keeps insects from creeping around the perimeter.
Common Problems and Easy Fixes
The Screen Is Too Loose
If the mesh droops or sags in the middle, the spline was installed without enough fabric tension or the spline diameter is too small for the channel. Remove the spline cord along three sides using a flathead screwdriver or paint scraper.
Re-anchor the top side, then pull the bottom of the mesh gently downward before re-rolling the spline cord into place with your screen tool. If the spline slips out easily, replace it with the next larger standard diameter, such as stepping up from 0.140 inch to 0.160 inch.
The Mesh Has Wrinkles
Wrinkles happen when the mesh threads are rolled out of alignment with the straight edges of the aluminum frame. Pry up the spline cord only along the specific wrinkled section.
Smooth out the screen fabric by aligning the vertical and horizontal grid lines parallel with the frame edge, then re-roll the spline cord back into the channel.
The Frame Does Not Fit the Opening
If the assembled frame is too wide or tall to fit inside the window casing pocket, the raw aluminum pieces were cut without deducting for the corner key shoulders. Pull the corner key inserts out of two adjacent aluminum rails.
Use a hacksaw to trim off the exact excess length from the aluminum ends, file away any metal burrs, and press the corner keys back together.
Corners Keep Separating
Plastic corner keys can crack if forced in at an angle or exposed to extreme cold over time. Replace damaged inserts with high-impact nylon or die-cast aluminum keys. A drop of exterior-grade silicone adhesive or construction epoxy on the internal prongs before insertion locks the frame joints permanently.
The Spline Will Not Stay in Place
If your spline pops out of the channel during wind or light contact, your spline diameter is too small or the channel walls spread open. Measure your frame groove width precisely and buy a spline cord that is 0.010 inch to 0.020 inch wider than the groove opening.
If you are using heavy fabric like a pet screen, make sure you are pressing the spline completely below the retaining lips of the channel.
How to Make Your Window Screen Last Longer
Cleaning without damaging the mesh
Accumulated dirt, pollen, and dust restrict light and fresh airflow through your screen fabric over time. Remove your screens once a year and lay them flat on a clean patio surface or lawn.
Spray them gently with a mild solution of warm water and liquid dish soap, using a soft-bristle brush to lift debris from the weave. Rinse with a low-pressure garden hose nozzle. Never use high-pressure power washers, since intense water pressure can stretch fiberglass or blow mesh out of its spline groove.
Seasonal inspection
Inspect your screens every spring before ventilation season. Check for loose spline, cracked corner keys, frame oxidation, or small tears near the edges. Catching a tear early lets you apply a drop of clear silicone sealant or a mesh repair patch before it runs across the whole window.
Replacing mesh without replacing the frame
One benefit of aluminum frame screens is their reusability. When the mesh eventually degrades from UV exposure or pet damage, there is no need to buy new frames. Hook a small screwdriver under the end of the old spline cord, pull the rubber strip out of the groove, discard the torn mesh, and roll fresh mesh into your existing frame for a fraction of the cost.
Proper off-season storage
In regions with severe freezing winters, taking down exterior screens protects the frames from snow weight and ice expansion. Store them flat or standing vertically on end in a dry garage, basement, or shed. Avoid leaning heavy garden tools or boxes against stored screens, which can bow the side rails or puncture delicate fiberglass weaves.
Frequently Asked Questions
Can I build a window screen without a screen kit?
Yes, you can build custom window screens without buying pre-packaged kits by purchasing raw aluminum frame stock lengths, matching corner keys, bulk spline rolls, and rolls of screen fabric individually. Buying bulk stock components allows you to customize the exact frame depth, color, and mesh material needed for non-standard window dimensions.
What is the best mesh for window screens?
Fiberglass mesh is the best overall choice for general residential windows due to its cost, flexibility, and ease of installation. For homes with active pets, vinyl-coated polyester pet screen is the best option for tear resistance. For sun-drenched south and west windows, solar screen fabric is best for reducing indoor heat gain.
How much smaller should a window screen be than the opening?
A custom window screen frame should generally be built 1/8 inch smaller in width and height than the minimum measured pocket dimension of the window track. This small clearance deduction accounts for thermal expansion, paint thickness, and easy insertion without causing the metal frame to bind inside the window frame tracks.
How long does it take to build a window screen?
Building a custom window screen takes approximately 20 to 30 minutes per window once you have gathered your tools and measured the openings. Measuring and cutting the aluminum frame stock requires about 10 minutes, while rolling the mesh, inserting spline, and trimming excess fabric takes another 10 to 15 minutes.
Can I reuse an old screen frame?
Yes, as long as the old aluminum frame rails are straight, square, and free of deep bends or crushed spline grooves, you can easily reuse the frame. Simply pull out the old vinyl spline cord, lift out the worn screen fabric, inspect or replace the plastic corner keys, and roll new mesh and spline into the existing metal channels.
Is fiberglass or aluminum screen mesh better?
Fiberglass is superior for ease of installation, dent resistance, and lower material cost. Aluminum mesh is better for raw structural strength, long-term rigidity across wide openings, and resisting damage from climbing animals or wind-blown debris. Aluminum requires more care during installation because it can crease permanently if rolled incorrectly with a spline tool.