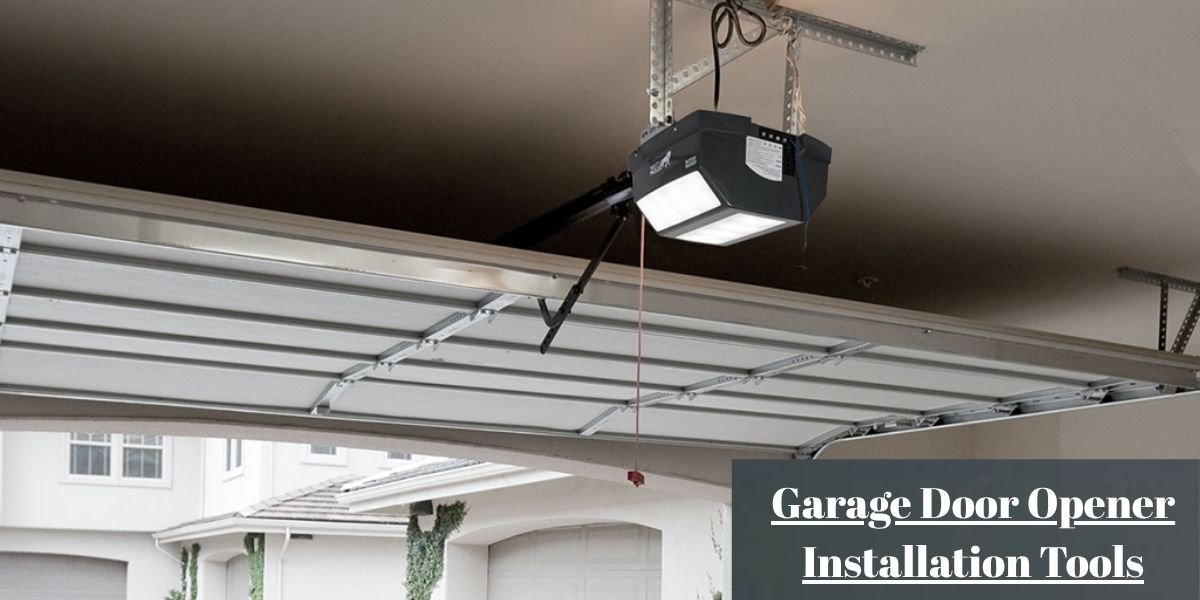
Standing on a cold concrete garage floor with an unpacked motor unit, three cardboard boxes of miscellaneous hardware, and a half-read instruction manual is a frustrating reality for many weekend DIYers. Installing a garage door opener is rarely a challenge because of complex microchip technology or onboard Wi-Fi pairing. The true test of a smooth installation comes down to getting heavy mounting brackets anchored securely into ceiling joists, aligning safety sensor optics across the door threshold, maintaining balance while working on an elevated ladder, and having the exact physical tools ready within arm’s reach before you turn your first bolt.
Most modern opener kits from manufacturers like Chamberlain, LiftMaster, or Genie include a staggering assortment of rail sections, curved door arms, safety sensor eyes, and hanging brackets. What they rarely include is the physical hand tools required to drive lag screws into overhead lumber or sockets to tighten suspension hardware. Pausing midway through a project to drive to the hardware store because a specific 7/16-inch socket is missing or a drill bit snapped inside a ceiling joist turns a three-hour job into an all-day ordeal. Gathering the proper equipment upfront ensures structural safety, prevents stripped fasteners, and eliminates installation mistakes that lead to premature mechanical failure.
Note: This guide is written for homeowners with a foundational comfort level using hand and power tools. If you have zero experience working on elevated ladders, handling structural fasteners, or interpreting basic mechanical instructions, tackling an overhead installation can quickly become unsafe. Garage door operators involve significant physical weight and mechanical tension. Proceed only if you feel confident in your DIY capabilities and physical safety practices.
Garage Door Opener Installation Tools Checklist
Essential Hand Tools You Need
1. Screwdrivers
Screwdrivers form the baseline of mechanical assembly when putting together the rail trolley system, terminal block connections, and wall control housing. You need both Phillips-head and flat-head drivers in multiple lengths and shaft diameters. Many opener kits utilize mixed fastener styles, combining deep-set terminal screws with broad pan-head screws on assembly brackets. Having multiple sizes prevents cam-out, which strips fastener heads and turns simple tightening steps into extraction nightmares.
2. Adjustable Wrench and Socket Set
The physical weight and operational vibration of a garage door opener demand robust mechanical fastening that hand-tightening alone cannot achieve. You will rely heavily on an adjustable wrench alongside a dedicated socket set featuring 7/16-inch, 1/2-inch, and 9/16-inch sockets. These exact sizes correspond to the standard lag bolts, carriage bolts, and hex nuts used across header brackets and hanging suspension iron. Relying on pliers instead of proper sockets rounds off bolt heads under torque.
3. Pliers
Pliers serve secondary but critical utility functions throughout the mounting process. Keep locking pliers, needle-nose pliers, and standard slip-joint pliers accessible in your tool belt. Locking pliers act as a temporary third hand to clamp rail sections or hold fast-moving carriage bolts steady while you torque down nuts from beneath. Needle-nose pliers prove essential for bending low-voltage thermostat wire around push-button terminals and trimming excess hanging strap material.
4. Tape Measure
A 25-foot tape measure dictates the entire geometric alignment of your installation. You must measure exact centerlines on the garage door header, calculate precise ceiling drop distances for motor suspension, and verify that the rail hangs parallel to the floor. An incorrect measurement at the header wall bracket causes the trolley carriage to bind against the rail, straining the DC motor and triggering auto-reverse safety faults.
5. Level
An operational torpedo level or standard 24-inch bubble level ensures structural integrity and smooth mechanical travel. The opener rail and hanging brackets must be plumb and level relative to the door tracks. If an operator rail slants downward or twists sideways, the door travels unevenly, generating friction that wears out plastic drive gears and triggers false obstruction sensors.
6. Pencil or Marker
A sharp construction pencil or permanent marker is indispensable for layout planning. You will use it to scribe centerlines onto the header wall above the door springs, map out ceiling joist locations found with your stud finder, and mark pilot hole depths before driving heavy structural fasteners into raw lumber.
Power Tools That Make Installation Easier
1. Cordless Drill
A reliable 18V or 20V cordless drill is the single most valuable power tool on the job site. It saves immense physical exertion when driving dozens of framing screws, drilling pilot holes into dense ceiling joists, and attaching heavy suspension brackets. Pair your drill with a quality drill bit set and a magnetic socket adapter to swap between driving bits and hex sockets instantly.
2. Drill Bits
Your bit selection must match the building materials surrounding your garage workspace. Keep standard wood twist bits for driving into overhead joists and drywall framing. If your garage features exposed concrete block walls or masonry headers where the header bracket must anchor, you will require heavy-duty masonry hammer drill bits paired with concrete sleeve anchors. Keep titanium metal bits handy if you need to drill custom mounting holes into steel support angles.
3. Impact Driver (Optional)
An impact driver is an optional powerhouse tool rather than a mandatory requirement. While a standard drill handles most tasks, an impact driver delivers rotational concussive force that makes driving heavy 5/16-inch lag screws into hardened overhead ceiling joists effortless. If you lack upper body strength or are working solo on high ceilings, an impact driver significantly reduces arm fatigue.
Safety Equipment Needed for Garage Door Opener Installation
1. Safety Glasses
Overhead installation work exposes your eyes directly to falling debris, sharp metal burrs, drywall dust, and splintered wood shavings. Industrial ANSI-rated safety glasses protect your vision while you drill upward into ceiling joists and clear out old mounting hardware.
2. Work Gloves
Handling galvanized steel rails, stamped steel brackets, and sharp wire ends tears up unprotected hands. Heavy-duty leather-palmed work gloves provide essential grip while protecting your skin from sharp factory edges, metal burrs, and pinch points during rail assembly.
3. Stable Ladder
Do not compromise on elevation safety. Never stand on rolling office chairs, plastic buckets, or unsteady household step stools to reach ceiling joists. Use a sturdy fiberglass or aluminum stepladder tall enough to let you work comfortably at chest height without stretching overhead beyond your center of gravity.
4. Headlamp or Work Light
Garages notoriously suffer from poor architectural lighting, particularly near ceiling joists where shadows hide structural framing members. A hands-free LED headlamp or a portable magnetic work light illuminates wiring terminals, optical sensor alignments, and fastener heads, ensuring precision work in dark ceiling cavities.
Garage Door Opener Installation Supplies and Materials You Need
1. Mounting Hardware
Opener boxes ship with a baseline assortment of hardware, but structural realities vary wildly between homes. Depending on your garage framing, you may need additional grade-2 or grade-8 lag screws, heavy-duty hex bolts, lock washers, and flat washers. Always follow manufacturer weight ratings because undersized fasteners sheer under the dynamic load of a moving door.
2. Ceiling Mounting Materials
Many garages feature open rafters or drywall-covered ceilings where joists do not align neatly with the back of the motor unit. You will likely need perforated angle iron or galvanized hanging straps to bridge the gap between the motor and structural framing. Never anchor a garage door opener solely to sheetrock or plaster; drywall lacks the structural shear strength to support a vibrating motor unit.
3. Electrical Supplies
Modern openers require dedicated power access. Ensure you have insulated cable staples, zip ties for managing low-voltage sensor wires, and an extension cord for temporary testing phases. Per electrical codes, your garage door opener must plug directly into a properly grounded ceiling receptacle rather than relying on permanent extension cords.
4. Replacement Hardware
Experienced installers always maintain a secondary stash of extra sheet metal screws, washers, cotter pins, and wire connectors. Dropping a tiny hairpin clip into insulation or losing a specialized nut behind a workbench will halt your installation progress instantly unless you have spares.
Tools and Supplies You Do Not Always Need but Are Helpful
- Socket Adapter for Drill: Speeds up repetitive hex-nut driving across long rail assemblies.
- Magnetic Parts Tray: Keeps small bolts, pins, and washers from rolling off ladder steps or vanishing into toolboxes.
- Stud Finder: Essential for locating hidden ceiling joists behind finished drywall ceilings.
- Multimeter: Useful only for advanced troubleshooting if low-voltage transformer wiring or wall control circuits require voltage verification.
Before Installing: Check Your Garage Door First
A garage door opener is designed strictly to lift a balanced door; it is not a mechanical winch meant to compensate for a broken, sagging, or unadjusted door system. Before unboxing your new operator, perform a physical health check of the door itself.
Test Door Balance
Disconnect your existing opener by pulling the red manual release cord. Manually lift the garage door halfway up its track and release it completely. A properly balanced door should remain stationary, holding its position without drifting up or slamming down. If the door falls rapidly or flies open, your torsion springs are dangerously out of balance and require professional adjustment before any opener installation begins.
Inspect Door Condition
Examine every mechanical component along the vertical and horizontal tracks. Look for snapped torsion springs, frayed steel lift cables, cracked nylon rollers, bent track sections, and loose hinge brackets. Attempting to automate a compromised door mechanism places extreme stress on the new motor gears, often resulting in immediate mechanical failure or catastrophic property damage.
DIY Garage Door Opener Installation Process Overview
Tackling the physical setup of an automatic garage door operator is a methodical process that requires patience and spatial awareness. You begin by laying out all the components on a clean floor space, connecting the tubular steel rail sections, and sliding the inner trolley carriage into place. Once the drive chain or reinforced belt is tensioned to the manufacturer’s specifications, you turn your attention to the structural header mount. Finding the exact vertical centerline of the door above the highest point of travel is critical; anchoring this bracket into solid framing rather than drywall ensures the operator can handle thousands of push-and-pull cycles without tearing loose.
With the header secured, lifting the motor unit usually requires two people to keep strain off your back. You slide the front rail into the header bracket, swing the heavy motor housing upward toward the ceiling, and suspend it using perforated angle iron bolted securely into overhead ceiling joists. Next comes the painstaking work of running low-voltage bell wire for the safety photo-eye sensors, mounting them low to the ground on either side of the track, and aligning their tiny infrared lenses until solid indicator lights confirm a clear beam. Finally, after plugging the unit into a grounded receptacle, you program the electronic travel limits and force adjustments, running multiple test cycles to verify that the auto-reverse safety feature responds instantly to any obstruction.
Common Mistakes When Installing a Garage Door Opener
- Mounting Into Weak Material: Fastening motor brackets directly into drywall guarantees that operational vibration will tear the anchors loose within weeks.
- Skipping Door Inspection: Automating a door with worn-out bearings or frayed cables destroys new opener gears prematurely.
- Incorrect Safety Sensor Alignment: Misaligned photo-eyes cause the door to reverse mid-close or refuse to shut entirely, frustrating DIYers who mistake the issue for motor failure.
- Installing Without Enough Ceiling Clearance: Failing to measure overhead track curves results in the door clipping the rail or failing to clear low-hanging garage storage shelves.
When Should You Avoid DIY Garage Door Opener Installation?
While bolting a residential opener to your garage ceiling is a common weekend project, there are distinct operational boundaries where taking matters into your own hands crosses into genuine physical hazard. The most critical threshold involves the high-tension torsion spring system mounted above the door opening. These springs store immense mechanical energy capable of inflicting severe trauma or fatal injury if mishandled or unwound without specialized winding bars and professional training. If your inspection reveals that your springs are broken, rusted out, or out of balance, leave the mechanical adjustments to a licensed technician before even opening the operator box.
Beyond spring safety, your home’s structural and electrical realities might make a DIY approach impractical. If your garage features complex open-truss roofing or requires custom overhead framing modifications to support heavy wooden or insulated commercial-grade doors, improvising support straps can lead to catastrophic structural failure under load. Similarly, if your garage lacks a dedicated ceiling outlet near the motor location, running permanent high-voltage wiring violates local building codes unless performed by a certified electrician. Recognizing these physical limitations protects both your safety and your home’s structural integrity.
Final Checklist Before Starting Your Installation
- Cordless drill
- Drill bits
- Screwdrivers
- Adjustable wrench
- Socket set
- Tape measure
- Level
- Ladder
- Safety glasses
- Gloves
- Mounting hardware
- Lighting
- Manufacturer installation manual
Frequently Asked Questions
What tools do I need to install a garage door opener?
You need a cordless drill, a socket set with standard hex sizes, screwdrivers, a tape measure, a level, a stable stepladder, and basic safety gear like glasses and gloves.
Do garage door openers come with installation hardware?
Opener kits include basic rail hardware, hanging brackets, and standard lag screws, but you may need to purchase extra angle iron or specialized fasteners depending on your garage ceiling structure.
Can I install a garage door opener without a drill?
Installing an opener without a power drill is technically possible using hand ratchets and manual screwdrivers, but driving lag screws into dense ceiling joists manually requires immense physical effort and increases installation time drastically.
How long does garage door opener installation take?
A standard DIY garage door opener installation typically takes between two and four hours for someone with basic mechanical aptitude and the correct tools ready.
Do I need two people to install a garage door opener?
Yes, having a second person is strongly recommended when lifting the heavy motor unit into place, leveling overhead rails, and holding components steady while securing ceiling fasteners.
What tools do professionals use to install garage door openers?
Professional technicians rely on heavy-duty impact drivers, commercial socket sets, laser levels, extension ladders, portable power generators, and specialty fastening gear to complete installations in under an hour.