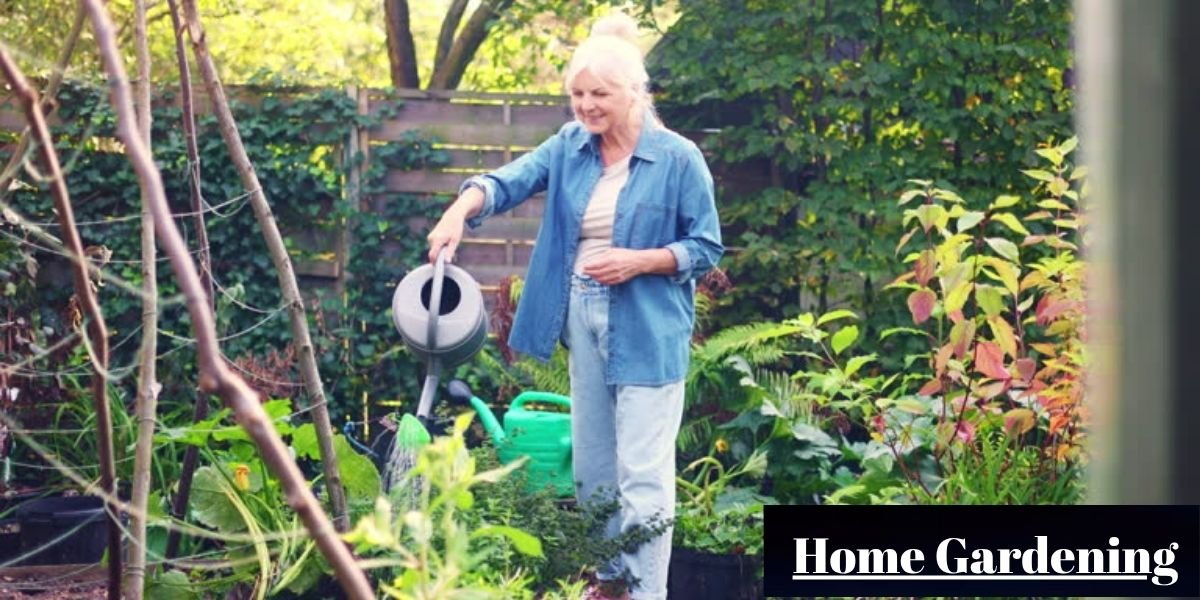
Starting a home gardening project is easily the most rewarding hobby you can adopt for your family. It is a powerful tool for physical fitness and mental relaxation. There is a specific kind of peace that comes from stepping away from a screen and getting your hands into the dirt.
For many of us, a vegetable garden is a strategic way to supplement supermarket produce with organic, nutrient-dense food. However, maintaining a thriving garden usually requires a team effort. You need at least two or three family members to stay on top of the daily needs. Many people give up after their first failed harvest because they lack the right knowledge.
I have been gardening for several years now. Through plenty of trial and error, I manage to secure a bountiful harvest for my family every single season. My garden is my sanctuary. It provides deep satisfaction, especially during the harvest phase.
I am sharing this guide to help those who have the passion but struggle with the execution. This article covers everything from soil preparation and watering to pollination and crop cycles. I have broken this down into phases so you can follow the journey from the first shovel hit to the final harvest.
A Simple Checklist Before You Start
Review this quick checklist to ensure your home is ready for the commitment. Gardening is not a set it and forget it project. It requires a consistent presence.
- Do you personally have at least 30 minutes to an hour a day? Consistency is more important than long, infrequent bursts of work.
- Ensure at least one or two other family members are willing to step in. If you get busy, someone must be there to keep the plants alive.
- Do you have a reliable water source near your planned garden area? Carrying heavy buckets back and forth will quickly drain your enthusiasm.
- You need a clear understanding of your available square footage and your specific climate zone.
- You need a well-planned strategy. Randomly throwing seeds in the ground rarely works. This guide will provide that foundational knowledge so you can start with confidence.
Phase 1: Choosing the Right Spot and Planning
Success in gardening starts long before you plant a single seed. Planning is the phase where you determine the potential of your harvest. If you pick the wrong spot, no amount of fertilizer will save your plants.
Select the Best Area for Your Garden
Your garden needs a sweet spot that balances sunlight and protection. Most vegetables require at least 6 to 8 hours of direct sunlight to produce energy. Avoid shady areas under large trees or the northern side of high fences. Plants in the shade will grow tall and spindly but will rarely produce fruit.
Beyond light, consider wind protection. A spot that gets lashed by heavy winds can break young seedlings. Think about proximity to your house too. The closer the garden is to your kitchen, the more likely you are to notice pests or dry soil early.
Decide Garden Size Based on Your Time
One of the biggest mistakes beginners make is starting too big. A massive garden bed looks great in photos but is a nightmare to weed and water if you have a full-time job.
Start small. A 10×10 foot space or even a few raised beds is plenty for a first-year gardener. It is much more encouraging to have a small, perfect garden than a large, overgrown mess. As you learn your daily rhythm, you can expand the following year.
Create a Simple Garden Layout
Once you have your spot and size, draw a simple map. Decide where each vegetable will go based on its height. You do not want tall plants like corn or pole beans shading out low-growing crops like lettuce.
Use basic tools like a tape measure and stakes to mark out your rows. Planning your layout helps you visualize the spacing needed for walking paths. If you cannot reach the middle of your garden bed without stepping on the soil, your layout needs a redesign. Stepping on soil compacts it, making it harder for roots to breathe.
Phase 2: Preparing and Improving Soil
The soil is the engine of your garden. If the soil is poor, your plants will be weak and prone to disease. Improving your soil is the most important physical work you will do all season.
Check Your Soil Type and Condition
Before planting, you need to know what you are working with. Is your soil sandy, or is it heavy clay? You can use a simple home test kit to check the pH levels. Most vegetables prefer a slightly acidic to neutral range.
Look out for trash plants or aggressive weeds like Johnson grass. These must be completely removed, including the roots. Otherwise, they will steal all the nutrients from your vegetables. Clear out any large rocks or debris as well. You want clean, workable earth that allows water to drain easily.
Improve Soil with Compost and Manure
Organic gardening relies on feeding the soil, not just the plant. I highly recommend mixing in a healthy amount of compost and well-rotted manure. Compost adds essential nutrients and improves the soil’s ability to hold onto moisture.
Manure is a great, cost-effective way to add nitrogen, but make sure it is aged. Fresh manure can be too hot and will burn your delicate plant roots. Mixing these two elements creates a rich, dark environment that encourages earthworms to do the hard work for you.
Make Soil Loose and Well Drained
Plants need oxygen at the root level. If your soil is hard like a brick, the roots will suffocate. Use a garden fork or a tiller to break up the earth at least 8 to 12 inches deep.
If your soil is naturally heavy clay, adding organic matter will help loosen it over time. The goal is friable soil. When you squeeze a handful, it should form a ball but crumble easily when you poke it. This texture allows for perfect drainage while keeping enough moisture for the plant to drink.
Prepare Soil Before Planting Season
Do not wait until the day you have your seeds to fix your soil. I try to prep my beds at least two to three weeks before the planting season begins. This gives the compost and manure time to settle and integrate with the existing earth. It also gives you a chance to clear out any new weed seeds that sprout after you have turned the soil. Having your beds ready to go means you can hit the ground running as soon as the weather is right.
Phase 3: Choosing Seeds and Plants
Now that your soil is ready, the fun part begins. Choosing what to grow is exciting, but you have to be strategic. You cannot just plant anything at any time. Success depends on matching your crops to the current weather and your own skill level.
Choose Vegetables Based on Season
Vegetables are highly sensitive to temperature. In the United States, most gardeners work with two main windows. I usually start my planting prep in early spring for cool-weather crops and late spring for heat-lovers. For example, I sow my seeds for the fall season in late summer to ensure they mature before the first frost.
To stay organized, I find it helpful to categorize plants by their preferred climate. Here is a quick reference for the two primary seasons:
Spring and Fall (Cool Season Crops)
These plants thrive when the soil is cool and can often handle a light frost. In fact, many taste sweeter after a cold snap.
- Leafy Greens: Spinach, Lettuce, Kale, Arugula, Swiss Chard, and Collard Greens.
- Root Vegetables: Carrots, Radishes, Beets, Turnips, Potatoes, and Parsnips.
- Brassicas: Broccoli, Cauliflower, Cabbage, Brussels Sprouts, and Kohlrabi.
- Legumes: Sugar Snap Peas, Snow Peas, and Fava Beans.
- Alliums: Onions, Garlic (planted in fall), Leeks, and Shallots.
- Perennials: Asparagus and Rhubarb (these come back every year).
- Herbs: Cilantro, Parsley, and Dill.
Summer (Warm Season Crops)
These vegetables need warm soil and plenty of sunshine. They will not survive a frost, so wait until the weather is consistently hot.
- Nightshades: Tomatoes, Bell Peppers, Hot Peppers, and Eggplant.
- Vine Crops: Cucumbers, Zucchini, Yellow Squash, and Pumpkins.
- Melons: Watermelon, Cantaloupe, and Honeydew.
- Legumes: Green Beans (Pole or Bush) and Lima Beans.
- Stalks and Grains: Sweet Corn and Okra.
- Tubers: Sweet Potatoes (these love the heat).
- Specialty Crops: Artichokes (these love the long summer sun).
- Herbs: Basil, Rosemary, and Oregano.
Seeds vs Seedlings (What to Start With)
Deciding whether to start from a seed or a seedling (a young plant) depends on the vegetable. Seeds are much cheaper and offer more variety. However, seedlings give you a head start of several weeks.
I prefer sowing root crops like carrots and radishes directly from seed because they do not like their roots being moved. For tricky plants like tomatoes or peppers, I almost always buy seedlings from a nursery. It saves me the hassle of managing indoor grow lights and gives me a plant that is already strong and healthy.
Easy Vegetables for Beginners
If this is your first time, do not overcomplicate things. Some plants are far more forgiving than others. I suggest starting with lettuce, radishes, and zucchini. These are resilient and rarely suffer from major issues if you miss a day of watering. Also, they germinate quickly and gives a great boost of confidence early on.
Other highly reliable options include:
- Spinach
- Sugar Snap Peas
- Potatoes
- Carrots
- Kale
- Swiss Chard
- Green Onions
- Yellow Squash
- Green Beans (Bush and Pole)
- Cucumbers
- Cherry Tomatoes
- Hot Peppers
- Beans
- Peas
By choosing easy crops, you gain the experience needed to tackle more difficult plants like cauliflower, artichokes, broccoli or eggplant in your second year.
Fast vs Slow Growing Plants
Understanding the growth rate of your garden helps you manage your expectations. Some plants are ready to eat in a month, while others take all season. I like to mix both so I always have something to harvest.
Here is a quick look at the growth speed and harvest habits for both cool and warm season crops.
| Plant Type | Days to Harvest | Harvest Frequency |
| Radishes | 25 to 30 Days | Single Time |
| Arugula | 30 to 40 Days | Multiple Times |
| Spinach | 40 to 45 Days | Multiple Times |
| Lettuce | 45 to 55 Days | Multiple Times |
| Cilantro / Dill / Parsley | 40 to 50 Days | Multiple Times |
| Baby Kale | 30 to 50 Days | Multiple Times |
| Swiss Chard / Collards | 50 to 60 Days | Multiple Times |
| Sugar Snap / Snow Peas | 50 to 70 Days | Multiple Times |
| Zucchini / Yellow Squash | 50 to 60 Days | Multiple Times |
| Bush Beans | 50 to 60 Days | Multiple Times |
| Cucumbers | 50 to 70 Days | Multiple Times |
| Beets / Turnips | 50 to 65 Days | Single Time |
| Broccoli | 60 to 100 Days | Multiple Times (Side shoots) |
| Cabbage / Kohlrabi | 60 to 90 Days | Single Time |
| Sweet Corn | 60 to 90 Days | Single Time |
| Carrots | 70 to 80 Days | Single Time |
| Potatoes | 70 to 100 Days | Single Time |
| Okra | 50 to 65 Days | Multiple Times |
| Tomatoes (Cherry) | 60 to 70 Days | Multiple Times |
| Tomatoes (Large) | 80 to 90 Days | Multiple Times |
| Peppers (Bell & Hot) | 70 to 90 Days | Multiple Times |
| Eggplant | 75 to 90 Days | Multiple Times |
| Cauliflower | 80 to 100 Days | Single Time |
| Brussels Sprouts | 90 to 110 Days | Multiple Times (Bottom up) |
| Melons / Watermelon | 80 to 100 Days | Single Time |
| Pumpkins | 90 to 120 Days | Single Time |
| Onions / Leeks / Shallots | 100 to 120 Days | Single Time |
| Sweet Potatoes | 100 to 120 Days | Single Time |
| Garlic | 240+ Days (Over winter) | Single Time |
| Artichokes | 120 to 150 Days | Multiple Times |
| Asparagus | 2 to 3 Years to establish | Multiple Times (Spring) |
| Rhubarb | 2 Years to establish | Multiple Times (Spring) |
| Basil / Rosemary / Oregano | 60 to 80 Days | Multiple Times |
Phase 4: Planting Seeds and Seedlings
This is the moment your garden officially comes to life. How you put your plants in the ground dictates how well they will grow. You need a few basic tools here, like a small hand trowel and a garden line to keep your rows straight.
Prepare Beds or Pots for Planting
Before you plant, decide on your container. Raised beds are my personal favorite because they offer great drainage and save my back from bending too much. However, for smaller spaces or a balcony garden, pots are an excellent option for herbs and peppers.
Make sure your beds are smooth and free of large clumps. If you are using pots, ensure they have drainage holes at the bottom. I sometimes use wooden raised beds if my budget allows, as they look beautiful and keep the soil contained. Whatever you choose, the soil should be loose and slightly moist before you start.
How to Sow Seeds and Maintain Spacing
Spacing is critical. If you plant too close together, your vegetables will fight for sunlight and nutrients. I use a simple ruler or even a marked stick to ensure I am following the instructions on the seed packet.
For small seeds like lettuce, I create a shallow “trench” with my finger. For larger seeds like beans, I poke individual holes.
Use the table below to guide your spacing for a standard garden bed:
| Vegetable | Spacing Between Plants | Plants per 100 sq. ft. |
| Carrots / Radishes | 3 inches | ~1,500 |
| Onions / Garlic / Beets | 4 to 6 inches | ~500 |
| Spinach / Arugula / Cilantro | 4 to 6 inches | ~500 |
| Lettuce / Swiss Chard | 6 to 10 inches | ~200 |
| Peas / Beans (Bush) | 4 to 6 inches | ~400 |
| Potatoes | 12 inches | ~100 |
| Peppers / Eggplant | 12 to 15 inches | ~60 |
| Broccoli / Cauliflower | 18 inches | ~45 |
| Cabbage / Kale | 18 inches | ~45 |
| Corn | 12 inches | ~100 |
| Tomatoes | 18 to 24 inches | ~25 to 30 |
| Cucumbers | 12 inches (Trellised) | ~100 |
| Zucchini / Summer Squash | 24 to 36 inches | ~12 to 15 |
| Melons / Pumpkins | 36 to 48 inches | ~6 to 10 |
| Asparagus / Artichoke | 24 to 36 inches | ~12 to 15 |
| Okra | 12 to 18 inches | ~50 |
Transplant Seedlings Safely
Moving a seedling from a small pot to the ground is a shock to the plant. So, it’s better to wait for a cloudy day or late afternoon to transplant. This prevents the hot sun from wilting the young plant immediately.
Gently squeeze the sides of the pot to loosen the root ball. Never pull the plant by the stem! Place it in a hole that is twice as wide as the pot. I make sure the soil level of the plant matches the soil level of the garden bed. Firm the earth around the base gently with your hands to remove any air pockets.
First Watering and Mulching After Planting
The first watering is the most important. You want to settle the soil around the roots without washing the seeds away. I use a watering can with a “rose” attachment to provide a gentle, rain-like mist.
After watering, I apply a layer of mulch, such as straw or shredded leaves. Mulching is a secret weapon. It keeps the soil cool, prevents weeds from sprouting, and stops water from evaporating too fast. It acts like a protective blanket for your new garden, keeping the moisture exactly where the roots need it.
Phase 5: Watering Your Garden
Once your plants are in the ground, watering becomes your most frequent task. It sounds simple, but consistent hydration is the difference between a lush harvest and a withered plot. I have learned that plants do not just need water; they need the right amount at the right time.
How Often to Water Plants
The frequency of your watering depends on the stage of the plant. Newly planted seeds and seedlings need a light misting every day to keep the top inch of soil moist. As the plants grow, I shift to a deep watering schedule.
In my garden, I usually water two to three times a week during a standard spring. In the heat of summer, this might increase every day. Instead of a quick sprinkle, I let the water soak deep into the earth. This encourages roots to grow downward in search of moisture, making the plants much more resilient.
Adjust Watering Based on Weather
Your watering routine should never be on autopilot. First, check the sky and the soil condition. If it rains, I skip the watering for a day or two. A great trick I use is the finger test. Stick your finger two inches into the soil. If it feels dry, it is time to water. If it feels damp, wait another day. During high winds, soil dries out much faster than you think, so keep an eye on your garden even if it is not particularly hot outside.
Avoid Overwatering and Underwatering
Too much water is just as dangerous as too little. Overwatering causes the roots to rot because they cannot breathe. You might notice yellowing leaves or a stunted look. On the other hand, underwatering leads to wilting and bitter-tasting vegetables.
I try to stay in the middle. If I see water pooling on the surface and staying there, I know I have overdone it. If the soil starts to crack, I am way behind. Maintaining a balance keeps the plant’s stress levels low and the growth steady.
Best Time of Day to Water
I strongly prefer watering my vegetables in the early morning. This is my personal ritual. It allows the water to soak deep into the roots before the sun gets hot enough to evaporate it.
If you water in the middle of the day, you lose a lot of moisture to the air. If you water late at night, the leaves stay wet for too long, which invites fungus and slugs. Morning watering gives the foliage time to dry off during the day while keeping the roots hydrated through the afternoon heat.
Phase 6: Feeding Your Plants (Fertilizing)
Think of fertilizer as a multivitamin for your garden. Soil is a living thing, and as your vegetables grow, they pull nutrients out of the earth. You have to put those nutrients back if you want a massive yield.
When and How to Start Fertilizing
I usually wait about three to four weeks after planting before I start a feeding schedule. Young seedlings are delicate and can be burned by strong fertilizers. Once the plant has several sets of “true leaves” and looks established, I start with a balanced feed. I apply it around the base of the plant, being careful not to let the fertilizer touch the stem directly.
Simple Organic Fertilizers for Home Garden
You do not need fancy chemicals to grow great food. I am a big fan of using what you have at home. Compost tea or even crushed eggshells can provide calcium to your soil.
Well-rotted manure is another excellent organic choice that releases nutrients slowly over time. These organic options improve the overall soil structure and are much safer for the environment than synthetic alternatives. They keep your vegetables truly organic and full of natural flavor.
Liquid Feeding for Faster Growth
Sometimes your plants need a quick boost, especially during the flowering stage. Liquid fertilizers are absorbed much faster by the roots and even the leaves. I use a diluted liquid seaweed or fish emulsion every two weeks.
It is incredible how quickly a pale, struggling plant can turn deep green after a liquid feeding. This is particularly helpful for “heavy feeders” like tomatoes that are working hard to produce fruit. It provides that immediate energy they need to keep growing strong.
Basic Feeding Needs (Light, Medium, Heavy Feeders)
Not all vegetables eat the same amount. Some are happy with a one-time soil prep, while others are constantly hungry. I group my plants so I don’t waste fertilizer on things that don’t need it.
Light Feeders:
These plants need very little help. They often prefer soil that isn’t too rich in nitrogen, as too much food can actually hinder their growth or flavor. These are Lettuce, Spinach, Arugula, Radishes, Turnips, Parsnips, Peas (Sugar Snap, Snow, and Fava), Carrots, and Herbs like Cilantro, Dill, and Parsley.
Medium Feeders:
these plants appreciate a steady supply of nutrients and usually benefit from a side-dressing of compost or fertilizer every few weeks. Medium feeder vegetables include Beets, Swiss Chard, Collard Greens, Beans (Green and Lima), Onions, Garlic, Leeks, Shallots, Potatoes, and Herbs like Basil, Rosemary, and Oregano.
Heavy Feeders:
These are the fuel-hungry plants of the garden. They require consistent, high-quality nutrients and frequent feeding to produce a successful harvest. They include: Tomatoes, Bell Peppers, Hot Peppers, Eggplant, Broccoli, Cauliflower, Cabbage, Brussels Sprouts, Kohlrabi, Cucumbers, Zucchini, Yellow Squash, Pumpkins, Watermelon, Cantaloupe, Honeydew, Sweet Corn, Okra, Sweet Potatoes, Artichokes, Asparagus, and Rhubarb.
Phase 7: Pest and Disease Control
Dealing with pests is part of the gardening experience. I used to get upset when I saw holes in my leaves, but now I view it as a sign that I need to pay a little more attention.
Common Garden Pests and Early Signs
Early detection is your best defense. I walk through my garden every morning to look for signs of trouble. You might see aphids (tiny green bugs) under the leaves or slug trails on the ground.
Yellow spots on leaves can be a sign of a fungal disease, while chewed-up edges usually mean caterpillars or beetles have arrived. If you catch these signs early, you can usually solve the problem by hand without needing any sprays.
Natural Pest Control Methods
A simple spray made of water and a few drops of Neem oil works wonders on most soft-bodied insects. Also, encourage beneficial insects like ladybugs into my garden because they eat aphids like a snack.
Another trick is companion planting. I plant marigolds near my vegetables because the scent keeps many pests away. It is a clean, effective way to protect your food without using harsh toxins.
Keeping Plants Clean and Healthy
Healthy plants are less likely to get sick. I make sure to remove any dead or yellowing leaves immediately so they don’t attract mold. Keeping the garden floor clear of fallen debris also denies pests a place to hide.
Proper spacing is also a form of pest control. If air can circulate freely between your plants, fungal diseases like powdery mildew struggle to take hold. A clean garden is a happy garden.
When to Use Chemical Solutions
Sometimes a pest outbreak gets out of control despite your best efforts. If I see a major infestation that is threatening to kill an entire crop, I might consider a targeted chemical solution.
If you go this route, always read the label carefully. Use the minimum amount required and only apply it in the evening when bees and other pollinators are less active. I only use chemicals as a last resort because my goal is always to keep my harvest as natural as possible.
Phase 8: Plant Care and Support
Gardening is a continuous conversation between you and your plants. As they grow taller and heavier, they require physical support and regular grooming to stay productive. I find this phase quite relaxing; it is like giving your garden a haircut and a steady hand to lean on.
Remove Dead Leaves and Maintain Plants
I make it a habit to walk through my rows and look for yellow, brown, or spotted leaves. These dead leaves are a drain on the plant’s energy. They also block airflow and can harbor diseases.
When you see a leaf that looks diseased or spent, snip it off near the main stem. This tells the plant to stop trying to save a dying leaf and focus its energy on growing new fruit. Keeping your plants clean also makes it much easier to spot pests before they become a problem.
Pruning for Better Growth
Pruning is not just about keeping things neat; it is about directing growth. For example, with tomato plants, I often remove the small suckers that grow in the “V” between the main stem and the branches.
If you let every single branch grow, the plant becomes a massive bush with very little fruit. By pruning, you ensure the plant sends its nutrients to the developing vegetables instead of just growing more leaves. It results in larger, tastier produce and a much more manageable garden bed.
Supporting and Training Plants
Some plants, like cucumbers, peas, and heavy tomato varieties, simply cannot support their own weight. If they sprawl on the ground, the fruit will rot and become an easy meal for slugs.
I use wooden stakes, wire cages, or string trellises to keep them upright. Training the plant is simple. As it grows, gently tie the main stem to the support using soft twine or strips of old cloth. Be careful not to tie them too tight, as the stem needs room to expand as it matures.
Phase 9: Pollination and Fruit Setting
This is the bridge between a healthy plant and an actual harvest. Without proper pollination, your plants might look beautiful but will never produce a single vegetable.
Understanding Flowering Stage
When you see the first flowers appear, it is a rewarding sign that your hard work is paying off. This is a critical stage. The plant is moving from its vegetative growth phase into its reproductive phase.
During this time, the plant needs consistent water and a bit more potassium. It makes me feel a sense of excitement when the garden starts blooming because it means the reward is finally around the corner. If flowers drop off without forming fruit, it is usually a sign of extreme heat or poor pollination.
Attract Pollinators Naturally
Most of our favorite vegetables, like squash and cucumbers, need bees and butterflies to move pollen from one flower to another. To get a better yield, I invite these helpers into my garden.
I plant bright, fragrant flowers like marigolds, zinnias, and basil right next to my vegetables. These act like a neon sign for bees. The more pollinators you have buzzing around, the more fruit your plants will set. Avoiding harsh chemicals also ensures these beneficial insects feel safe staying in your garden.
Hand Pollination for Better Yield
Sometimes, nature needs a little nudge. If I notice that my squash or melons are flowering but the tiny fruits are shriveling up and falling off, I step in with hand pollination.
It is very simple. I take a small, soft paintbrush or even a Q-tip and gently swirl it inside a male flower to collect the yellow dust (pollen). Then, I dab it into the center of a female flower. It only takes a few seconds, but it can significantly increase your harvest if the local bee population is low.
Phase 10: Harvesting Your Crops
Finally, the moment we all wait for has arrived. Harvesting is the ultimate reward for your patience and effort. However, knowing exactly when to pick is a skill of its own.
When and How to Harvest Vegetables
Picking at the right time ensures the best flavor and texture. Most vegetables are at their peak when they are young and tender. If you wait too long, they can become tough, stringy, or bitter.
I use a sharp pair of garden shears or a knife for harvesting. Never pull the fruit off with your hands, as you might accidentally tear the plant or damage the roots. If a vegetable feels firm and has reached its characteristic color, it is likely ready for your kitchen table.
Harvesting Leafy vs Fruiting Plants
The technique changes depending on what you are picking. For leafy greens like spinach or lettuce, I use the “cut and come again” method. I snip the outer leaves and leave the center intact so the plant continues to grow.
For fruiting plants like peppers or eggplants, you want to harvest as soon as they are ripe. In fact, the more you harvest from a pepper plant, the more it is encouraged to produce new fruit. For root crops like carrots, I gently loosen the soil around the top first to make sure they are big enough before pulling them up.
Handling Vegetables After Harvest
Once the produce is off the plant, it starts to lose moisture. I try to harvest in the cool of the morning when the vegetables are at their crispest.
Bring them inside immediately. Some things, like tomatoes, are best kept at room temperature to preserve their flavor. Others, like leafy greens and broccoli, should be washed gently in cool water and placed in the refrigerator. If you have a massive harvest, you can look into freezing or canning to enjoy your garden’s bounty all winter long.
Phase 11: After Harvest Care and Next Cycle
A good gardener is always thinking one step ahead. Once a plant has finished its life cycle, your job isn’t quite done. You need to prepare the “house” for the next guest.
Remove Old Plants and Clean the Garden
When a plant stops producing, I remove it entirely. Leaving old, spent plants in the garden is an open invitation for pests and diseases to move in for the winter.
I pull the plants up by the roots and shake off the excess soil. If the plants were healthy, I add them to my compost pile. If they showed any signs of disease, I dispose of them in the trash to keep the garden clean. A tidy garden bed is much easier to manage when the next planting season rolls around.
Reuse Soil and Add Compost
Your soil has worked hard all season and has likely given up a lot of its nutrients to your vegetables. To refresh it, I always add a new layer of compost.
I usually spread about two inches of fresh compost over the beds and gently mix it into the top layer of soil. This replenishes the minerals and keeps the soil structure healthy. I do this a few weeks before the next cycle so the microorganisms have time to settle in. It makes the soil nutrient-rich and ready for a fresh round of seeds.
Plan Your Next Crop Cycle
Now is the time to reflect. I look back at my garden and ask myself what worked and what didn’t. Did the tomatoes get enough sun? Were the beans too crowded?
I use these lessons to plan the next cycle. I also practice crop rotation. I never plant tomatoes in the exact same spot two seasons in a row. Moving plant families around prevents specific pests and diseases from building up in the soil. With a clear plan and refreshed soil, you are ready to start the cycle all over again, only this time, you’ll be an even better gardener.
Closing Lines
Home gardening is a journey of growth, not just for the plants, but for you too. It is a beautiful way to connect with nature and provide fresh, healthy food for your loved ones. I am 100% confident that if you follow these phases, you will be satisfied with the results and see a massive improvement in your yields.
Don’t be afraid to make mistakes; that is how we all learn. Take that first step, get your hands in the soil, and start your own garden today. Your family and your dinner table will thank you for it!