Most playrooms do not fail because parents picked the wrong toys. They fail because nobody planned the space the way an occupational therapist or a preschool classroom designer would: with clear activity zones, reachable storage, and a layout that matches how kids move. Walking into hundreds of playrooms over the years reveals a predictable pattern: a $400 toy chest nobody opens, a rug covered in sharp blocks, and a corner crammed with forgotten items. Within six months, even a beautifully staged playroom collapses into a holding pen for plastic. Storage systems break down, oversized furniture eats the floor plan, and toys pile up wherever gravity takes them. Counterintuitively, a room stuffed with options often gets used less, not more. Kids need legible, predictable spaces rather than abundant ones.
A successful remodel is not about buying more toys, painting every wall a neon primary color, or chasing a showroom photo that only looks perfect because someone tidied it thirty seconds before the camera flashed. It is about designing an adaptable room where a child can build, read, move, and, critically, put things away without fighting a bad floor plan. A 2018 University of Toledo study published in Infant Behavior and Development found that toddlers given four toys instead of sixteen played with each one nearly twice as long and engaged in far more creative, varied play. Fewer, well-organized choices consistently beat more chaotic ones. That single finding should reshape how you think about the entire remodel.
Transforming the space takes a logical, sequenced approach. Address the physical structure of the room, its activity zones, its storage systems, and its safety requirements in that specific order. You will end up with an environment that actually supports how children develop, instead of one that just looks nice on social media.
Start With the Room You Already Have
Before opening a single catalog or ordering shelving, evaluate the space you have and how your kids use it today. Jumping straight to decorating almost always produces a room that looks sharp for a day and then reverts to its old problems by the weekend because the underlying organizational issues were never touched.
Look at how the room is being used now
Watch the room before redesigning it. Spend three or four days paying attention to where your kids naturally gravitate, what they carry out of the room and never bring back, and which corner turns into a disaster zone first. That first cluttered spot is almost never a discipline problem. It is a clear signal that storage there is either too full, too high, or simply in the wrong place relative to how the room flows.
Separate the toys used daily from the ones untouched for months. Most families find this splits closer to an 80/20 ratio than they expect, which is exactly why generic one bin for everything storage fails. Then look hard at your furniture. Occupational therapists who consult on children’s spaces use a rough rule of thumb: if any single piece, such as an oversized toy chest, a heavy coffee table, or an unused bookcase, consumes more than 30% of your open floor area, it is actively suppressing gross motor play. Pull the tape measure out before deciding anything else.
Decide what the room needs to do
Every family needs a different functional mix, and age is the biggest variable. A toddler needs generous, cushioned floor space for crawling, pulling up, and dumping bins, along with storage low enough to reach without climbing. School-age children need dedicated surfaces: a sturdy craft table that can handle glue and marker bleed-through, a cozy reading nook, a building station with a surface that does not need to be cleared daily, or a quiet homework spot with real task lighting instead of a single overhead bulb.
Design around your children’s actual daily habits, not an aspirational version of how you wish they played. A room built for an imagined child will sit half-used. A room built for the child you actually have gets worn out from love.
Plan the Layout Before Buying Anything
Furniture and storage should follow the room’s natural traffic patterns rather than getting shoved against whatever wall happens to be empty. A layout planned around foot traffic prevents the most common cause of instant clutter: items getting stacked in walkways because there was nowhere else to set them down.
Keep the physical center of the room open. That is the primary area for train tracks, floor puzzles, and unstructured building, and it is the one zone that should never have furniture creeping into it.
Make sure nothing you place blocks a window, a natural light source, or a doorway’s swing path. A beanbag chair parked in a door swing is a tripping hazard during energetic play.
Position each toy category right next to the zone where it is actually used, and keep high-energy areas physically separated from quiet, focused ones. A child deep in a book should not have to compete with a sibling running laps three feet away. Interior designers who specialize in children’s spaces generally recommend leaving 24 to 36 inches of clear walkway between distinct zones. Anything tighter creates constant physical collisions and visual overwhelm, even if the square footage on paper looks generous.
Give Every Kind of Play Its Own Place
Early childhood educators have used activity-based learning centers in classrooms for decades. The National Association for the Education of Young Children has published guidance on this model since the 1980s, and the same logic transfers directly to a home playroom. Clear zones give kids intuitive cues about where an activity belongs and where it goes back when playtime ends.
A main play area
Reserve a generous stretch of uninterrupted open floor near the center of the room. This is the primary arena for open-ended, imaginative play, the kind that changes shape day to day from a pretend campsite to a sprawling track layout. It should stay genuinely empty between uses rather than becoming a landing zone for unhoused items.
A reading corner
Tuck a reading nook into a low-traffic corner, away from the main path through the room. A low bookshelf that displays covers forward rather than spines out dramatically increases how often young children pick a book on their own, a principle Montessori classrooms have used for a century. Add a soft rug, floor cushions, or a child-sized armchair, and make sure the spot gets warm, adequate light from a nearby window or a dedicated lamp. A dim corner rarely gets chosen twice.
A craft and drawing area
Set up a durable, washable child-sized table with comfortable seating nearby. Store supplies where kids can reach them without asking: hanging wall cups, a rolling cart, or shallow paper trays all work well. Protect the surrounding wall with washable paint or a paneled surface, because marker and glue stick migration onto drywall is practically inevitable.
A building and floor-play zone
Give construction toys, like wooden blocks, magnetic tiles, and complex train sets, their own dedicated corner. A low-rimmed play tray or a flat play mat keeps small, sharp-edged pieces contained instead of migrating across the entire room, which matters as much for foot safety as for tidiness.
An active-play area
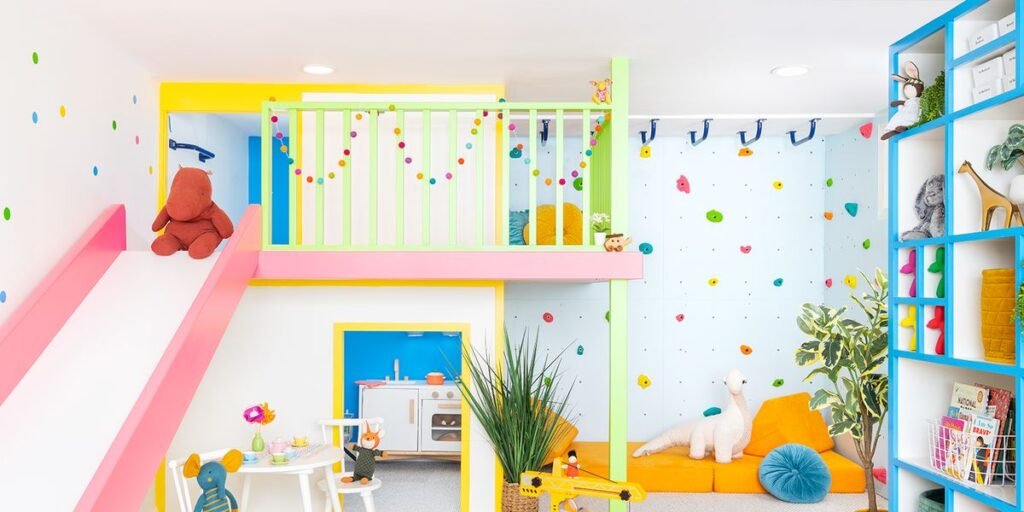
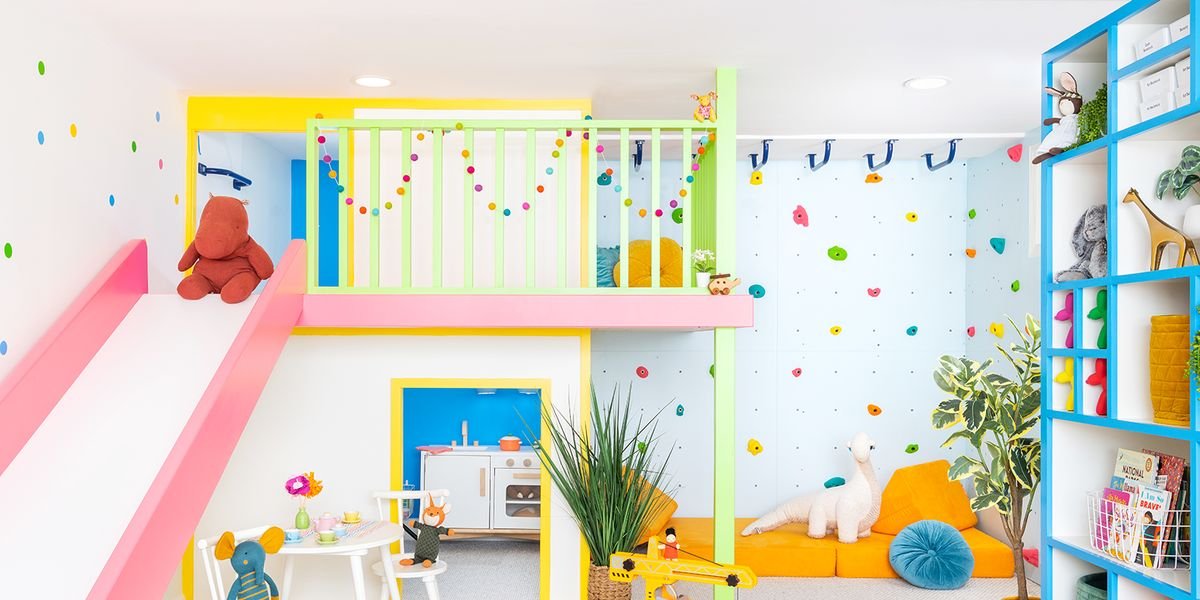
If the room’s dimensions allow it, build in a physical outlet: a securely mounted indoor swing, a low climbing wall, or modular soft-play blocks. This zone needs its own safety buffer, completely clear of hard furniture edges and sharp corners, since a fall is expected as part of normal active play.
Fix the Storage Before You Add More Toys
Poor storage is the single leading cause of a messy playroom. If putting a toy away requires complex stacking, heavy lifting, or digging through an overcrowded bin, children simply will not do it. That is a design flaw, not a behavioral issue.
Use storage children can reach
Install open, low shelving and shallow, lightweight bins positioned below your child’s eye level. When kids can see their options at a glance and physically reach them, independent play and cleanup both improve dramatically. This is standard practice in early childhood spaces, where shelf height is treated as a core design variable.
Mix open and closed storage
Open shelving works well for daily favorites and curated display items. Closed cabinets, opaque baskets, or deep drawers are far better suited for anything with dozens of loose parts, like complex board games or mixed art supplies, where visual chaos on open shelves creates unnecessary clutter.
Make use of forgotten spaces
Vertical wall space, the back of the door, and empty corners hold massive storage potential that most remodels ignore. Custom built-ins, a window seat with a lift-up top, or sliding under-bench containers add meaningful capacity without consuming central floor area.
Store toys according to how they are used
Skip the deep toy box entirely. Small pieces sink to the bottom, get forgotten, and effectively disappear from rotation. Instead, organize by activity category:
- Keep construction sets like Lego bricks and wooden blocks in clear, separate bins so pieces stay sorted by system.
- Store pretend-play costumes and accessories together in wide fabric totes.
- Organize art materials strictly by medium, keeping markers, paints, and paper in their own containers.
- Display books forward-facing on wall ledges, and stand board games upright on shallow shelves rather than stacking them flat where the bottom box inevitably gets crushed.
Choose Flooring That Can Handle Real Play
Playroom flooring has to balance daily physical comfort against true durability. It is one of the most consequential structural decisions in the entire remodel, since kids spend a huge share of their time directly on the floor.
Wall-to-wall carpet feels warm and cushions falls well, but it traps dust, absorbs spills permanently, and shows paint or marker stains almost immediately. Hardwood, luxury vinyl plank (LVP), or quality laminate gives you a non-porous, genuinely wipeable surface that shrugs off spills and rough play, though it needs supplemental cushioning underfoot. LVP in particular has become the go-to choice for playrooms because it is fully waterproof and typically costs $3 to $7 per square foot installed, which is a fraction of solid hardwood.
Layering large, washable area rugs or interlocking foam mats over hard flooring gives you the best of both worlds. Whatever you choose, add a non-slip rubber backing or a quality rug pad underneath every soft layer. Sliding rugs are a serious fall risk during active games, and fixing them is one of the easiest safety upgrades in the whole remodel.
Make the Walls Work Harder
Walls in a playroom should not just be painted boundaries. They can carry real functional weight if you design them intentionally.
Use a high-durability, washable paint in an eggshell or satin finish, which lets you wipe away scuffs, fingerprints, and crayon marks with a damp cloth instead of repainting every year. If you are painting a room for young kids, look for a low-VOC or zero-VOC formula. Many major brands offer GREENGUARD Gold certified paints specifically for children’s spaces, where off-gassing makes a noticeable difference in a small, frequently occupied room.
Turn vertical surfaces into interactive stations using magnetic chalkboard paint, a wall-mounted whiteboard, or a full-surface felt board. Low wall ledges for displaying artwork or a pegboard fitted with hooks and small bins keep craft tools organized and off the table surface. This small change measurably reduces daily clutter because supplies have one obvious home instead of drifting across the floor.
Choose Furniture That Earns Its Space
Avoid filling the room with single-use, rigid kid furniture that becomes functionally obsolete in two or three years. Prioritize pieces that adapt as your children grow, because playroom furniture is one of the few categories where spending slightly more up front on versatility genuinely pays for itself over time.
A sturdy storage bench that offers seating on top while hiding bins underneath does double duty in a room where floor space is scarce. An activity table with built-in drawers, or a reversible top that flips to reveal a building plate on one side and a smooth work surface on the other, extends the life of a single piece by several years. Modular shelving that sits low and horizontal for toddler access, then flips vertical into a full bookcase as kids get older, is a favorite among designers specifically because it eliminates the outgrown furniture problem.
Build a Reading and Quiet Spot Into the Room
A well-designed playroom needs a genuine slow-down space to counterbalance its high-energy zones. Children experience real sensory fatigue during active play, and a spot to decompress is essential for emotional regulation. The American Academy of Pediatrics has repeatedly emphasized, most notably in its 2018 clinical report on the power of play, that unstructured downtime is just as developmentally important as active, structured movement.
A small upholstered armchair, a plush beanbag, or a thick floor cushion tucked into a quiet corner, or under a curtained canopy if you want to clearly signal a retreat, works exceptionally well. Surround it with a curated handful of books, soft lighting, and minimal visual noise. This spot does not need to be elaborate; it just needs to feel calm and remain consistently available.
Make the Playroom Easier for Parents to Live With
A playroom has to work for the adult maintaining it just as much as it works for the kids playing in it, or the whole system collapses within a few weeks.
Build an organizational system where every object has one clearly defined home. Use both text and picture labels for kids who are not reading fluently yet, since a photo of the bin’s contents taped to the front does far more for independent cleanup than any written word. Position storage so parents have a clear sightline into the main play zones from an adjacent hallway or kitchen, simplifying supervision without requiring you to physically stand in the room.
Toy rotation is the single most underused tool in playroom management. Store roughly 30% to 50% of less-frequently-used toys out of sight in a closet or garage bin, and swap them into the room every few weeks. Kids treat rotated toys like brand-new arrivals, novelty stays high, and daily clutter drops sharply because there is simply less material in circulation at any given time.
Let the Room Grow With Your Kids
Designing an economical playroom means resisting expensive, hyper-specific age themes that demand a full overhaul every couple of years. A dinosaur mural might be adorable at four, but it feels completely outgrown by age eleven.
Keep the expensive, permanent elements timeless: neutral, high-quality finishes on walls, flooring, built-in cabinetry, and primary furniture pieces that are costly to replace. Introduce youthful color and character through cheap, swappable accessories instead, such as throw pillows, removable wall decals, rotating gallery art, or an affordable area rug that can be swapped in an afternoon. Choose adjustable-height tables and modular shelving that can carry toddler toys today and study materials or media gear in a decade. You will get ten full years of use out of a single remodel instead of having to execute three separate makeovers.
Don’t Forget Lighting
Lighting fundamentally changes how a room feels and functions across the day. A single overhead bulb is almost always insufficient, creating harsh shadows in some corners while leaving others dim regardless of wattage.
Layer bright, even ambient light across the whole space using flush-mount ceiling fixtures or recessed lighting. Add dedicated task lighting, like a flexible desk lamp or a wall-mounted reading light, directly over art tables, desks, and reading corners. Ambient light alone is rarely strong enough for detailed work like drawing or reading small print.
For evenings, soft warm lighting from dimmable sconces, an LED strip, or a simple nightlight creates a calmer atmosphere for wind-down time. Keep every cord short, anchored, and completely out of reach. A dangling lamp cord is a serious hazard that is easy to prevent during the initial layout phase.
Build Safety Into the Remodel
Safety belongs in the structural planning stage, not on a checklist you run through after the furniture is already in place. The risks involved in play spaces are well documented and largely preventable.
Furniture tip-overs are an ongoing danger. The U.S. Consumer Product Safety Commission reports that a child is treated in an emergency room for a tip-over injury roughly every 30 minutes in the United States, and tall storage units are frequently involved. Anchor every bookshelf, dresser, media console, and storage unit directly into wall studs using rated anti-tip furniture straps. Furniture manufactured to meet ASTM F2057, the voluntary tip-over standard for clothing storage units, offers a solid baseline when shopping for new pieces.
Choose furniture with rounded corners where possible, or add discrete soft edge protectors to sharp table corners. If you are mounting a sensory swing or a climbing structure from the ceiling, anchor it into structural joists using hardware rated for the load, never into drywall alone, and confirm it meets local building requirements before use.
Keep electrical outlets covered with child-safe faceplates, and ensure all window coverings are cordless. The Window Covering Manufacturers Association made cordless designs standard for stock products sold in the U.S. starting in December 2018 specifically to eliminate strangulation risks. If your home has older corded blinds, replacing them during a playroom remodel should be a top priority.
A Simple Order for Your Playroom Remodel
Working through the remodel in a logical sequence saves money and prevents the frustration of installing items before you actually know what the room requires.
- Empty and declutter: Remove everything from the room, sorting items into keep, donate, store, and discard piles. You cannot design a functional layout around clutter you have not yet confronted.
- Evaluate needs: Observe how your kids actually play and define the room’s real functional requirements before making a single purchase.
- Measure accurately: Map exact floor dimensions, door swings, and window placement on paper. Guessing at this stage causes expensive mistakes later.
- Design layout zones: Mark dedicated areas for main play, crafts, reading, and storage directly on your floor plan.
- Complete structural work: Finish DIY home improvement tasks such as electrical updates, painting, wall repairs, and flooring installation before anything else goes in.
- Install permanent fixtures: Secure heavy built-ins, wall shelving, pegboards, and overhead lighting.
- Position furniture: Bring in primary pieces, anchoring every tall unit into wall studs as you go rather than waiting until afterward.
- Organize and populate: Sort toys into logical, labeled containers and place them in their designated zones.
The Finished Playroom Should Feel Easy to Use
A genuinely successful playroom remodel is not judged by whether it looks magazine-ready every minute of the day. No lived-in room does, and chasing that standard is a losing battle. It is judged by how seamlessly the space functions during ordinary daily life when nobody is watching.
When a room has intuitively arranged zones, storage kids can actually reach, and open floor space that stays open, children settle into deep, self-directed play far more easily. Just as importantly, an adult resetting the room afterward can do it in a matter of minutes rather than an hour, which determines whether the organizational system survives past the first month. A playroom built this way does not just look better on day one. It keeps working years down the road, naturally evolving alongside your family instead of needing to be torn out and redone every time your children enter a new developmental stage.