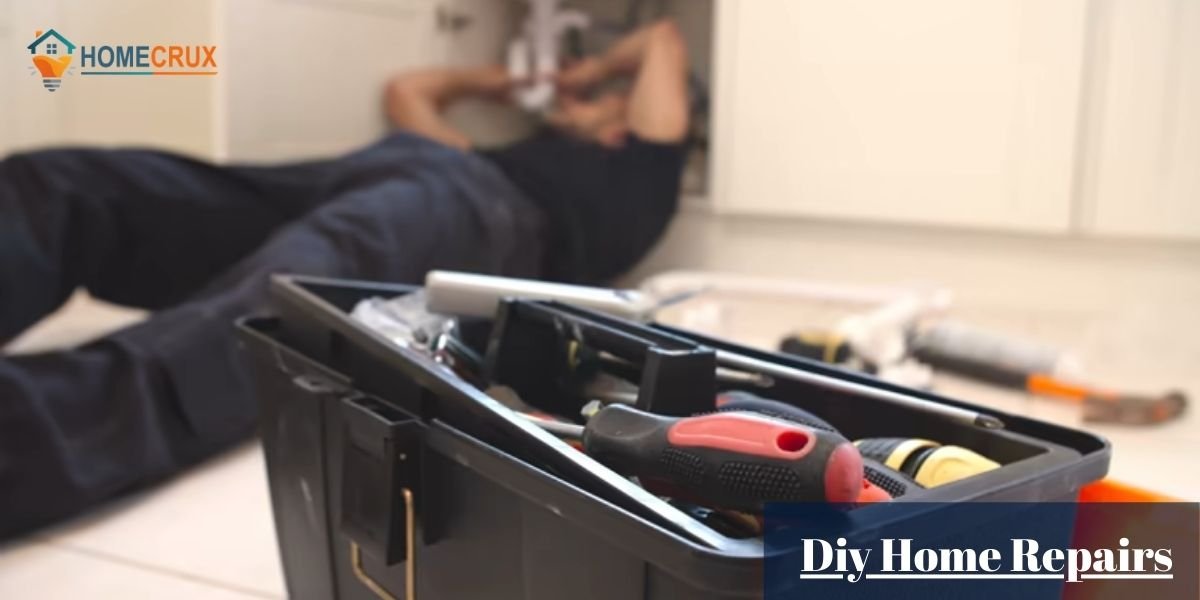
Ever stared at a dripping faucet and minor plumbing issues and thought, “I should really fix that? But the effort is, “Where do I start?” You’re not alone. Most homeowners deal with these small, persistent issues.
The professionals charge a fortune to repair. Many of them can be handled with basic tools. All you need is the right tools. Additionally, you need to know a few reliable tricks that actually work. There are fancy gadgets, but with endless errors.
DIY home repairs aren’t about turning yourself into a contractor overnight. They’re about using smart tricks. Time-tested shortcuts to save money. It also saves your time.
These tricks aren’t tactics. They come from experienced people who’ve repaired hundreds of homes and know what truly works. With prices rising on almost everything, learning a few of these repair skills puts you in control. No more costly service calls that drain your budget for minor fixes.
Is The Job Diy-Safe? Consider Safety First
Before touching a tool, decide if the job you’re doing is safe for you. Make sure that you have sufficient time. Check the placement of the right tools. Confirm you have the basic skills to do the work thoroughly.
Repair jobs, such as hanging a painting on a wall, are beginner-friendly. A professional should handle jobs that involve structural work with complex wiring.
Ask yourself three questions. Can this cause a fire? Is a flood expected? This may cause some structural damage if I make a mistake. Am I working close to electricity? Is the job I am going to do related to gas? Do I need an assistant? If the answer to any of these questions is yes, rethink.
Focus on low‑risk projects. Try small plumbing tasks like fixing leaky faucets. It can include clearing clogs. Work on cosmetic improvements like patching. Handle easy hardware problems, such as loose hinges.
Put on personal protective equipment. Use gloves. Consider ballistic eyewear. Wear a face mask while sanding. Always hold a first‑aid kit close to you.
| 📍Pro Tip: When you’re unsure, get help from a professional. If the risk is high, paying for know-how is cheaper. It can cost you later. |
- Quick Plumbing Fixes
Small plumbing problems can be handled with simple tools. Slower drains and leaky showers are tiny issues and can be solved with patience.
These jobs are often listed as “safe to DIY.” You can usually shut off the water to lower the pressure.
- Basic tools worth owning. You need a plunger with an adjustable wrench. You can also have a plumber’s tape with a small drain snake.
- For slow drains, start with hot water. To start with, a manual snake is also an option. It will avoid harsh chemical cleaners that can damage pipes
- For small visible drips under sinks, check the slip nuts. They are snug with rubber gaskets. Make sure they are in place before replacing major parts.
- Always shut off local water valves. Stop the water near the fixture. It is an important step in taking anything apart.
| 📍Pro Tip: Capture photos of the plumbing layout before disconnecting. Also, bring a worn part to the hardware store. The matching parts visually save time. It also prevents repeat trips. |
- Stop Clogged Or Running Toilets
Clogged toilets are one of the most common household issues. Running toilets are usually very fixable without a plumber.
The key is to use the right plunger technique. You need to understand the simple parts inside the tank.
- For clogs, use a flange plunger. The flange plunger is designed for toilets. Make sure it’s with a good seal. The plunge should be steady with strong pushes. Use dish soap with hot water. It will help loosen stubborn clogs.
- Never flush “flushable” wipes. Don’t make cotton pads flush with paper. These are frequent causes of blockages.
- For a running toilet, lift the tank lid. Check if the flapper is sealing. Check if the chain is tight/too loose. Also, check if the float is set too high.
- Chains, flappers, and valves are inexpensive. They are designed to be replaced with basic tools.
| 📍Pro Tip: Drop a few drops of food coloring into the toilet tank. Wait for 15–20 minutes. Don’t flush till then. If color appears in the bowl, the flapper is leaking. They should be replaced. |
- Fix The Faucet And The Leaky Trap
A dripping faucet under a sink wastes water. Damp P‑traps can damage cabinets. The primary fix is usually straightforward.
Most faucet drips come from shabby washers. O‑rings with traps often leak at loose connections. They can be caused by old gaskets.
- Turn off the water at the closure valves below the sink. Open the faucet to release pressure. This makes it easier to disconnect the fittings.
- Note the faucet type before replacing. Replace the matching internal parts. Follow a manufacturer’s diagram.
- Start by placing a bucket under the leaking sink trap. Use a wrench to loosen the slip nuts. Remove any buildup inside the trap. Check the condition of the rubber washers. Reassemble and tighten gently
- Use plumber’s tape to cover the threaded joints. It will prevent small leaks.
| 📍Pro Tip: Lay parts out on a towel in the order you remove them. This simple “left‑to‑right” layout makes reassembly almost foolproof. |
- Re-Caulk And Seal Tricks
Fresh caulk around windows and tubs not only looks cleaner. It also protects against moisture damage. It’s highlighted as one of the easiest high‑impact DIY repairs.
- Remove old caulk completely with a plastic scraper. Use a caulk remover tool. New caulk won’t bond well to failing material.
- Clean the surface thoroughly. Use painter’s tape on both sides of the joint for clean edges.
- Cut the caulk tube tip small at an angle. Apply steady pressure for a consistent bead.
- Smooth the bead with a caulk‑smoothing tool. Use a damp finger and remove the tape while the caulk is wet.
| 📍Pro Tip: Use paintable latex caulk for trim. Use siliconized caulk for bathrooms and kitchens because water is constant. |
Paint And Everyday Cosmetic Repairs
Cosmetic fixes like painting can add a fresh look. A few little touch-ups, like adding surface repairs, instantly change the space.
This is ideal for beginners. They require more patience than advanced skill. The preparation makes all the difference.
- Always clean surfaces first. Make paint and fillers fail early.
- Invest in decent brushes. Cheap tools leave visible streaks. Low-cost tools shed bristles.
- Use painter’s tape carefully along the trim. Use painter’s tape around fixtures for clean lines.
- Keep a small labeled container of leftover paint for future use. Write the room with the date on the lid.
| 📍Pro Tip: Work with natural light whenever possible. Flaws in the paint add patches. They show up more clearly. Correct them before everything dries. |
- Patch Nail Holes And Wall Damages
Fixing nail holes with minor dents in drywall is one of the simplest DIY jobs. It’s one of the most cost‑effective ways. The basic materials can make walls look almost new before painting.
- For small nail holes, use lightweight spackle. Use a ready‑mixed joint compound applied with a putty knife. Use smooth flush. Let them dry. Put sand and paint.
- For small holes, you may need a patch. Use a mesh tape before applying the compound.
- Feather the edges of your compound wider. Hide the hole for transitions when painted.
- Dust off sanding residue before painting. The leftover dust causes blotchy finishes.
| 📍Pro Tip: For tiny nail holes in white walls. A quick temporary fix is to rub a white bar of soap over the hole. Wipe gently, filling the spot until you repaint properly. |
- Paint Walls With Practical Tricks
Painting a full room or walls is a classic DIY project. It offers a big visual outcome. If you take your time during prep, the final result looks close to professional.
- Apply sand imperfections before painting. The paint will highlight. It will not hide flaws.
- Use primer on patched areas. Changing from dark to light colors for better coverage. It will give an even tone.
- Cut in edges with a brush before using a roller on the main areas.
- Roll in a consistent pattern (like “W” shapes). Maintain a “wet edge” to avoid marks.
-
| 📍Pro Tip: Slightly dampen your roller cover before pouring paint. It helps the roller load evenly. It reduces lint while giving a smoother finish. |
Read More: 30 Wall Decor Ideas to Transform Every Room in Your Home
- Fix Loose Hardware, Doors, And Floors
Squeaky hinges, loose handles, and minor floor noises are small irritants. They add up, yet they’re usually quick fixes.
Tightening fasteners while using simple lubricants restores everything. They become too quiet for solid operation.
- For cabinet hardware, tighten screws. If they spin freely, use longer screws to fill the hole. Fill holes with wooden toothpicks. You can also use wood glue before reinstalling.
- Lubricate squeaky hinges with a few drops of household oil. Use silicone spray for wiping off excess. It will avoid drips.
- Minor floor squeaks can be fixed easily. Drive trim screws through the subfloor into the joist. Work carefully when fastening from above. Repair the area from below. Add shims between the joists. These methods reduce floor noise.
- Check and tighten loose handrails. Banisters are safety features. They are not just décor.
| 📍Pro Tip: Keep a small “squeak kit” ready. A screwdriver and a compact lubricant can fix small issues the moment you hear them, instead of putting them off. |
Smart Maintenance Tricks
Small, consistent maintenance tasks prevent bigger repairs. They keep your home comfortable and effective.
Take them as “health checks” for the house, quick. These are routine jobs that avoid expensive surprises.
- Keep a seasonal checklist by month. They include visual inspections and changes needed. You can simply test for leaks.
- Walk through your home regularly, looking for early warning signs.
- Schedule recurring reminders on your phone. Add reminders for different tasks, like filter changes.
- Fix small issues immediately. Delays often turn a five‑minute fix into a pricey repair.
| Pro tip: Keep a dedicated “home notebook” of repairs with dates. Keep the contractor contacts, so you’re never guessing later. |
- Water, Roofline, And Gutters Management
Water is one of the most deadly forces in a home. Managing it around the foundation is critical.
Cleaning gutters while maintaining drainage is a standard DIY task. They prevent leaks as well as foundation issues.
- Clean the gutters twice a year. Clean them for hanging trees.
- Use a stable ladder. Work with a partner for safety while using a ladder. Put on gloves when cleaning leaves.
- Check that downpipes discharge water several feet away from the foundation.
- After heavy rain, walk around the house and look for issues.
| Pro tip: Install simple gutter guards if it’s a constant problem. They reduce cleaning frequency but require periodic checks. |
Start With The Best Diy Home Repair Tips!
If you’re new to DIY, start with small tasks to build your confidence. Expand your skills with the gained experience. Choose low‑risk projects that deliver visible results. After
Sometimes, you can see the impact of your effort. Begin with simple cosmetic repairs. Once you’re comfortable, move into basic plumbing. After that, you can start electrical tasks.
Watch several tutorials before starting a task. Read the manufacturer’s instructions carefully. Handling a project in different ways helps you avoid mistakes. True skill develops through practice. It needs patience.
Treat every project like a short class. Take before and after photos. Write down materials used, note what worked, and record what you’d change next time. These notes will be a big help when you face similar repairs in the future.
Read More: Luxury Home Renovation: Inspiring Home Renovation Ideas