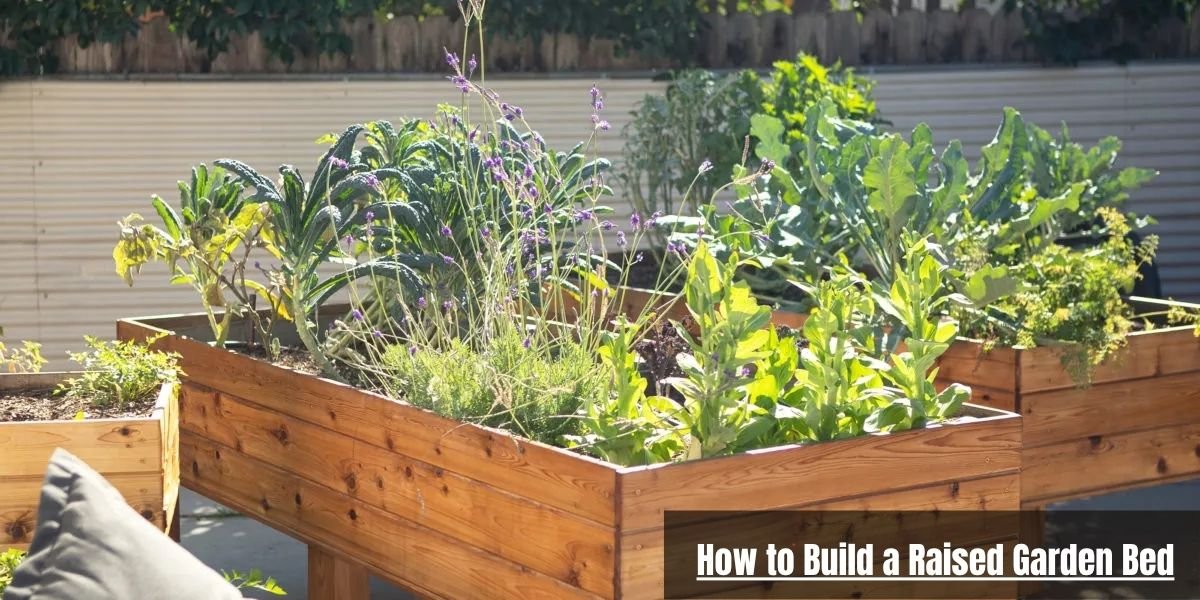
A raised garden bed is the fastest route to good soil, reliable drainage, and heavier harvests when the ground you own is heavy clay, compacted fill, or too rocky to dig. Interest has climbed steadily since the 2020 gardening surge, and questions that once sparked endless forum arguments now have real university research behind them. This guide covers the decisions that separate a bed lasting five years from one lasting twenty: dimensions, placement, material, soil, and the construction details that keep a frame square and rot-free.
Planning before you buy lumber is where the money gets saved. A frame sized wrong, built from the wrong grade of wood, or dropped in the wrong corner of the yard fails in predictable ways: bowed side walls, washed-out soil, and crops that never get enough light. Ten minutes with a tape measure and a sun-tracking app prevents most of it.
Plan the Bed Before Buying Materials
Every good build starts with a single question: what do you actually intend to grow? Tomatoes, peppers, and deep-rooting carrots draw on a far deeper soil reservoir than shallow herbs, lettuce, or cut flowers. A mixed planting needs a middle-ground depth that serves varied roots without paying for soil volume you will never use.
Decide early whether this is permanent or a bed you might move. Permanent installations justify heavier timbers, ground-driven corner posts, or a masonry base, while modular setups use lighter boards and corner brackets that come apart cleanly if you reorganize or move house.
The space you have dictates the footprint. The most common beginner error is filling a whole yard segment and leaving no room to work. Leave at least 18 inches of walking clearance on every side, and closer to 3 feet on the side you will run a wheelbarrow or cart.
Watering access and reach both belong in the plan. A bed set too far from a hose bib gets neglected during the first real July heat spike. Position it so you can reach the center from either side without stepping in, since every footstep compacts the soil and crushes the feeder roots that do most of the work.
Think about expansion before the first cut. Building the first bed to a standard 4 foot by 8 foot module lets you drop in matching units later on a uniform grid, keeping irrigation, pathways, and mowing tidy instead of improvised.
Pick the Right Location
Sunlight is the biggest lever on yield for anything you plan to eat. Fruiting crops such as tomatoes, peppers, squash, and beans want 8 or more hours of direct sun and sulk below 6, while leafy greens and many herbs tolerate 4 to 6 hours and even welcome afternoon shade in hot regions. Track the shadows across your yard through a full day, noting how fences, the house, and tree canopies swing shade across the site each afternoon.
Drainage protects both the crop and the frame. Avoid the low pockets where water stands after a downpour, since a bed there rots from the bottom up and drowns roots. Flat ground, or a gentle grade that carries excess water away, is what you want.
Wind is the overlooked factor. Steady exposure snaps trellised beans and tall corn and dries out the topsoil fast. A fence line or shrub row on the windward side takes the edge off, as long as it does not shade the bed for half the day.
Keep clear of large trees, and know that not all threaten a bed the same way. Maple and willow are aggressive surface rooters that climb into rich, moist bed soil to compete for water and nutrients. Black walnut is more serious: it releases a compound called juglone that is directly toxic to the nightshade family, meaning tomatoes, peppers, eggplant, and potatoes are among the most sensitive crops. The University of Wisconsin-Madison plant pathology program reports the toxic zone can reach 50 to 80 feet from the trunk, strongest inside the dripline. Near a black walnut, either grow juglone-tolerant crops such as beans, corn, beets, and squash, or build a deep bed with a barrier walnut roots cannot penetrate.
Decide on the Best Size and Height
A width of 4 feet is the working standard because it lets an average adult reach the middle from either side without kneeling on the soil. If the bed backs onto a wall or fence with access from one side only, drop the width to 2 feet so nothing sits out of reach.
Length comes down to space and lumber. 8 feet is the default because boards sell in 8, 10, 12, and 16 foot lengths, keeping cut waste low. Anything longer than about 6 to 8 feet needs a mid-span brace or support stake, or the side walls bow outward once the soil is saturated.
Soil depth most directly shapes what will thrive and how the bed holds moisture. The practical tiers break down like this:
- 6 to 8 inches suits shallow-rooted greens, radishes, spinach, and strawberries, but only if the native soil beneath is already loose.
- 12 inches is the reliable baseline for most vegetables, including beans, onions, cucumbers, and brassicas, and the depth most extension services point beginners toward first.
- 18 to 24 inches is what deep taproots, potatoes, and full-size tomatoes want, and it is essential over hardpan, rock, or concrete where roots cannot reach the ground below.
Working height decides how your back and knees feel after an hour of weeding. Ground-level beds sit around 10 to 12 inches and mean bending and kneeling. Beds built to 24 to 30 inches cut most of the stooping out of the day and make gardening accessible for anyone with limited mobility, at the cost of more soil to fill and heavier bracing.
| Bed Height | Recommended Crops | Primary Advantage | Considerations |
| 6–8 Inches | Salad greens, herbs, radishes, spinach | Lowest material cost and simplest build | Needs decent native soil underneath |
| 12 Inches | Tomatoes, peppers, beans, root crops | Best balance of cost, soil volume, and drainage | Standard board width makes construction easy |
| 18–24 Inches | Deep taproots, potatoes, squash, large brassicas | Excellent root run and strong moisture holding | Large soil volume to buy and fill |
| 30+ Inches | All standard vegetables and trailing crops | Maximum reach with almost no stooping | Heavy internal bracing and higher cost |
Compare the Best Materials Before You Build
Cedar
Western Red Cedar is the benchmark for outdoor wood. Its natural oils and tannins fend off decay, fungus, and insects with no chemical treatment, and its tight grain resists warping and splitting. One detail matters more than most guides admit: only the heartwood, the darker inner wood, carries that rot resistance, while pale sapwood breaks down almost as fast as untreated pine. Expect an untreated cedar bed to last 10 to 15 years in constant moisture, which makes its higher price reasonable over that lifespan.
Redwood
Redwood shares cedar’s oil-based defense against insects and decay, and heartwood runs a touch more durable, often 12 to 20 years in the ground. Supply and pricing are best on the West Coast, while the rest of the country pays a premium to ship it.
Pressure-Treated Lumber
This material carries the most outdated advice online, so it is worth getting right. The arsenic-based preservative gardeners were warned about, chromated copper arsenate or CCA, was pulled from residential lumber at the end of 2003. Everything sold since uses copper-based systems instead: alkaline copper quaternary (ACQ), copper azole (CA), and micronized copper azole (MCA). Copper deters insects, a paired fungicide handles rot, and there is no arsenic.
The strongest evidence available comes from an Oregon State University study led by Brooke Edmunds, Gerald Presley, and Matt Konkler, running in a Willamette Valley garden since 2021 and now in its sixth year. Their beds, built from Douglas-fir treated with copper azole to a ground-contact rating, showed measurable copper leaching only within 1 inch of the wood, in the range of 20 to 68 ppm above untreated beds, and even that stayed inside the natural background copper range for local soils. Across four growing seasons of testing a dozen crops, from arugula and basil to tomatoes and root vegetables, they found no increase in copper in any of them. The durability payoff showed up plainly by year six: the untreated Douglas-fir boxes had rotted so badly in the lower half that they needed replacing, while the treated boxes were nearly intact.
Two practical rules follow. Buy lumber rated for ground contact, not just above-ground use, and paint any fresh-cut end with a cut-end preservative to seal the exposed core. One caveat: certified-organic rules prohibit synthetic treated wood, so organic growers should choose cedar, redwood, or a non-wood option, and anyone wary of copper contact can line the inner walls with heavy plastic.
Composite Boards
Composite lumber, made from recycled plastic and wood fiber, will not rot, splinter, or absorb water and never needs sealing. Its weakness is stiffness: it sags under wet soil across any real span, so plan on a support stake every 2 to 3 feet. Cost runs high, but the frame routinely lasts 20 years or more.
Galvanized Steel
Corrugated galvanized steel panels and stock-tank-style beds give you an industrial look and outstanding structural life. The zinc coating corrodes sacrificially in place of the steel, which is why reputable beds specify a G90 rating or better, meaning at least 0.90 ounces of zinc per square foot. Zinc migrates into soil only meaningfully in acidic conditions, so holding soil pH in the 6.0 to 7.0 range keeps leaching negligible, and zinc is a plant micronutrient anyway. These beds are light to move, quick to assemble, and last 15 to 30 years. The one trade-off is heat: dark metal warms the soil edge faster, a spring bonus and a summer liability in hot climates.
Tools and Supplies You’ll Need
A prepared workspace speeds up construction and gives you tighter joints. Here is what belongs on the bench before the first cut:
Essential Gardening Tools
- Circular saw or hand saw
- Cordless drill and driver bits
- Tape measure and carpenter pencil
- Speed square or framing square
- 4-foot spirit level
- Two 12-inch bar clamps, minimum
- Shovel and flat spade
Building Materials
- 2×10 or 2×12 boards cut to size
- 4×4 corner posts
- 3-inch exterior deck screws, coated or stainless steel
- Uncoated corrugated cardboard or heavy brown kraft paper
- 1/2-inch galvanized hardware cloth
Optional Upgrades
- Steel corner brackets or aluminum angle iron
- Food-safe interior liner
- Drip irrigation tubing and connectors
- Dowel pins or decorative top caps
Build the Frame
Measure and Cut the Boards
Lay the lumber out on something flat and level, a driveway or a pair of sawhorses. Measure twice, cut once. For a standard 4×8 box, cut two boards to 8 feet for the sides and two to 45 inches for the ends. The 45-inch figure accounts for the 1.5-inch actual thickness of each side board, so the finished outer dimensions land at exactly 4 feet by 8 feet.
Cut four corner blocks from a 4×4 post, matched to the side-board height for a flush build, or left long to drive into the ground as anchor stakes. Clean, square cuts keep the joints tight enough to hold soil in.
Assemble the Corners
Stand one 45-inch end board flat against a 4×4 post, top and outer edges flush, and clamp it. Pre-drill pilot holes with a bit slightly smaller than the screw shank, which keeps dense woods like cedar from splitting at the end grain. Send three 3-inch deck screws through the board into the post, evenly spaced, and repeat for the second end assembly.
Square the Frame Before Fastening
Attach the two 8-foot side boards to your end assemblies, but hold off on the final screws. Check square by measuring both diagonals, corner to corner each way, and nudge the frame until they match within a fraction of an inch. A square frame will not warp under load and makes every later add-on, from row covers to trellises, drop into place cleanly.
Secure the Joints
Drive three 3-inch screws through each side board into the corner posts, and add galvanized corner brackets on the inside seams for extra hold. If your bed runs longer than 8 feet, set a vertical 2×4 at the midpoint and run a cross tie side to side, which stops the walls from deflecting once wet soil leans on them.
Position and Level the Bed
Carry the frame to its spot and set your 4-foot level across the top edges, along both sides, both ends, and diagonally. Dig out high ground under the boards until the bubble sits dead center every way you check it. Never prop a low corner up with loose soil or scraps, which shift within a season and let the frame settle out of true.
Prepare the Ground Before Installation
Skip the backbreaking job of stripping established turf. Knock down tall weeds and flatten the footprint. Leaving the grass lets that buried layer break down into food for earthworms below.
Leveling closes the gaps along the bottom edge where soil would wash out in heavy rain. Cut down high mounds and pack low pockets with coarse sand or gravel for a firm, even seat.
Lay a thick layer of plain, uncoated cardboard across the footprint inside the frame, overlapping every seam by at least 6 inches so no weed finds a gap. Cardboard smothers what is underneath and rots into worm-friendly organic matter within a season, which is why extension programs favor it over synthetic barriers.
If gophers, moles, or voles work your yard, line the base with 1/2-inch galvanized hardware cloth. Roll it across the floor, staple it up onto the lower inside walls, and overlap seams by 4 inches to shut burrowing pests out. This same barrier does double duty near a black walnut, slowing juglone-laden roots from climbing into the bed.
Skip landscape fabric at the bottom. It is fine under gravel paths, but in a growing bed synthetic geotextile blocks earthworms, stops taproots from reaching subsoil, and traps water in a soggy seam along the base.
Fill the Raised Bed the Right Way
Filling a bed is not the place to dump native yard soil, which packs down like a brick inside container walls and suffocates roots. You want a light, open blend that holds moisture and drains freely.
The best-known recipe is Mel’s Mix, from Mel Bartholomew’s Square Foot Gardening, using equal parts of three ingredients:
- One third compost for nutrients, microbes, and structure. Blend several sources, such as mushroom compost, leaf mold, and aged manure, rather than relying on one.
- One third coconut coir or peat moss to hold water in reserve while keeping the mix airy. Coir is the more sustainable choice, since peat harvesting releases stored carbon.
- One third coarse vermiculite for aeration and drainage.
Many gardeners swap quality topsoil for the peat or coir third, trading some lightness for mineral weight, which suits deeper beds. Extension services including Iowa State and the University of Maryland lean simpler still, often equal parts topsoil, compost, and coarse sand, or a 1:1 compost and soilless mix with up to 20 percent topsoil for beds over 16 inches deep.
One caution: more compost is not always better. Oregon State horticulturists warn that gardeners routinely overdo it, driving phosphorus and salt levels too high over time. Keeping compost to a third to half the total is the safer target.
Layer your ingredients in and turn them through with a garden fork until evenly blended. Fill to within 2 inches of the rim, water deeply to settle air pockets, then top off with compost before planting.
Estimate How Much Soil You’ll Need
Working the volume out ahead keeps you from ordering short or overpaying for bags. The formula: length times width times depth, all in feet, gives cubic feet. To reach cubic yards, the unit bulk suppliers use, divided by 27.
Quick Soil Volume Reference
| Bed Size (Feet) | Depth (Inches) | Volume in Cubic Feet | Volume in Cubic Yards | 0.75 Cu. Ft. Bags Needed |
| 4 x 4 | 12 | 16 | 0.6 | 22 |
| 4 x 8 | 12 | 32 | 1.2 | 43 |
| 4 x 8 | 18 | 48 | 1.8 | 64 |
| 4 x 10 | 12 | 40 | 1.5 | 54 |
| 3 x 6 | 12 | 18 | 0.7 | 24 |
Planting the First Crops
Arrange crops by mature height and sun demand. Put the tall ones, trellised tomatoes, climbing beans, and corn, along the north edge so they do not shade shorter neighbors as the sun tracks across.
Group herbs and cut-and-come-again greens along the outer edges where you reach most, and tuck sprawling crops like zucchini and cucumber near the corners, where vines can spill over the frame instead of smothering their neighbors.
Companion planting can lean the odds your way, though it helps to know which pairings rest on evidence and which are tradition:
- Tomatoes and basil is the classic pairing. Basil is thought to mask the tomato from some pests and share the bed space efficiently, though the pest effect is more modest than folklore suggests.
- Carrots and radishes genuinely work. Fast radishes mark the rows and break the surface crust for slow carrot seed, and you harvest them before the carrots need the room.
- Lettuce under taller brassicas buys the greens light afternoon shade during warm spells, which delays bolting.
Follow real spacing guidance rather than eyeballing it. Rich bed soil supports tighter planting than in-ground rows, but overcrowd and you choke off airflow and invite powdery mildew.
Mistakes That Shorten the Life of a Raised Garden Bed
A few errors show up again and again, each with a clear fix:
- Using untreated softwood and expecting decades. Cheap untreated pine, spruce, or fir rots fast. Oregon State saw untreated Douglas-fir 2×12 boards rot through the lower half by the sixth season, and thinner 1-inch boards fail sooner, often in 3 to 5 years.
- Ignoring drainage. Setting a frame over hard-packed clay or trapping water behind a plastic barrier rots the wood from the base up and drowns roots.
- Overfilling above the rim. Heaping soil past the top edge presses wet soil against the exposed top grain, speeding fungal decay and washing out messily in the rain.
- Building against a fence or wall. Bolting a bed to a fence or the house traps moisture against that structure and invites termites and rot into something far more expensive than the bed.
- Going wider than 4 feet. Beds you cannot reach across force you to step on the soil, and every footstep compacts it and damages feeder roots.
- Skipping the leveling step. A frame on a slope drains unevenly, leaving one end swampy while the other stays parched.
Keeping the Bed Productive Year After Year
Feed the soil surface, not the whole profile. Spread 2 to 3 inches of finished compost across the top each spring and fall and let the earthworms carry it down. No-dig maintenance keeps the soil structure and its microbial network intact. Resist piling it on, though, since too much compost pushes nutrient levels out of balance over time.
Keep 2 inches of clean mulch, shredded leaves, straw, or wood chips, over the surface year-round. It holds moisture, steadies root temperatures through midsummer, and shields the soil organisms working below.
Soil levels sink as organic matter breaks down, so top the bed off annually with a compost and topsoil blend to hold your depth.
Give the frame a look each spring before planting. Check for loose joints, fungal growth along the soil line, and bowing walls. Tighten what has backed out, swap damaged hardware, and add corner brackets if joints start to gap. A ten-minute inspection is what turns a five-year bed into a fifteen-year one.
Frequently Asked Questions
How deep should a raised garden bed be?
12 inches covers most vegetables, giving roots room to develop while holding moisture. If the bed sits on concrete, rock, or hardpan where roots cannot reach the ground below, build to 18 to 24 inches.
Should a raised garden bed have a bottom?
Beds on lawn or open soil should stay open-bottomed, which encourages deep roots, lets earthworms move up, and drains freely. Beds on a deck, patio, or concrete need a solid bottom with drainage holes, lined so soil does not wash out.
What wood lasts the longest?
Among natural lumber, redwood and Western Red Cedar heartwood run longest, roughly 10 to 20 years. Ground-contact pressure-treated lumber outlasted untreated boards by years in Oregon State’s trials, while composite and galvanized steel beds can reach 20 to 30 years.
Can I build one directly on grass?
Yes. Mow the grass short, set the frame over it, cover with overlapping plain cardboard, and fill with soil. The grass smothers and breaks down within a few months, feeding the soil as it goes.
Do I need landscape fabric?
No, not at the base of an open-bottom bed. Synthetic fabric limits root depth, blocks earthworms, and clogs with fine particles over time. Plain cardboard smothers weeds just as well and rots into the soil instead.