
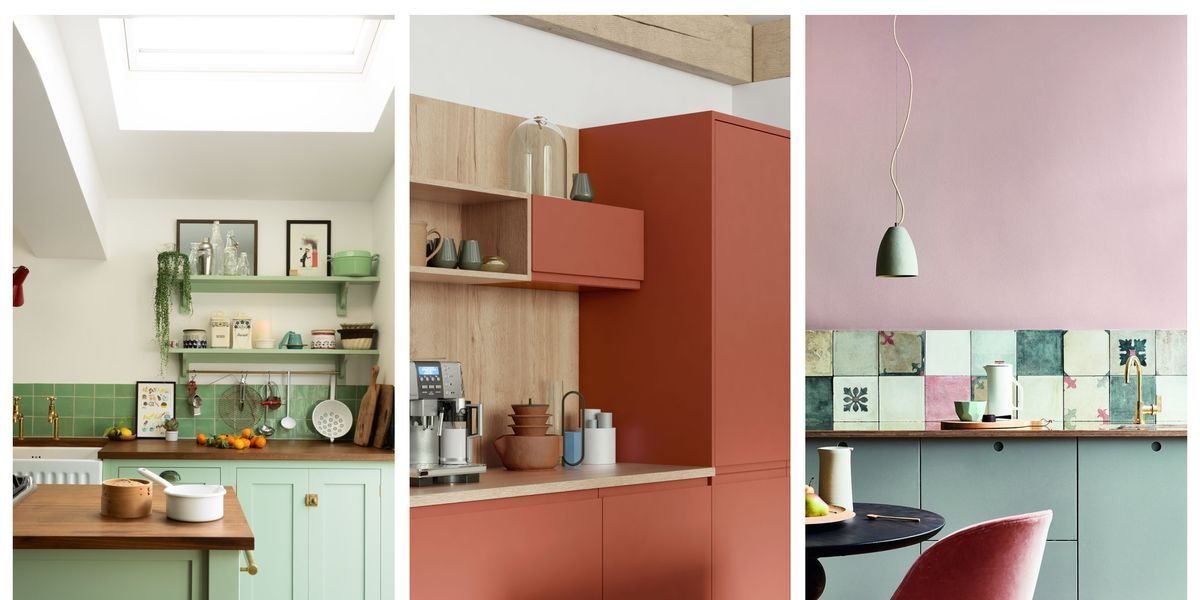
Painting kitchen cabinets DIY costs $180 to $600 in materials. Compare that to a full tear-out and replacement, which easily hits $5,000 to $15,000+ once you account for custom boxes, new doors, and labor. Refinishing sound frames keeps the structural woodwork you have already paid for while completely transforming the space. According to 2026 remodeling cost-versus-value data, minor kitchen updates centered on refaced or repainted cabinets recoup nearly 95% of their cost at resale, compared to roughly 40% for a full high-end overhaul.
I have walked into kitchens where a DIY paint job began peeling at the hinges within four months, and others where a 25-year-old oak setup looked factory-new two years after application. The difference was never the paint color; it was the prep.
A durable cabinet finish requires two things: mechanical adhesion and thorough chemical cleaning. If you skip degreasing or grab a leftover can of wall paint from the garage, the finish will chip, peel, and show brush marks in months rather than years.
Cabinets take abuse walls never see: slamming doors, splash zones, steam, and constant skin oils. Before buying paint, inspect the underlying material. Solid wood, wood veneer, and MDF (medium-density fiberboard) take paint exceptionally well when prepped correctly. Thermofoil (the vinyl-wrapped MDF common in 2000s builder-grade homes) or any frame showing water damage and swollen particleboard requires repair or replacement rather than a coat of paint.
What You’ll Need to Paint Kitchen Cabinets
Gathering trade-grade supplies upfront prevents mid-project delays and keeps applications within specified recoat windows.
Materials
- Cabinet Enamel Paint: Waterborne alkyd-urethane or acrylic urethane (Benjamin Moore ADVANCE, Sherwin-Williams Emerald Urethane Trim Enamel, or INSL-X Cabinet Coat)
- Stain-Blocking Primer: Shellac-based (Zinsser B-I-N) or heavy-duty oil-based (Zinsser Cover Stain)
- Degreaser: TSP (trisodium phosphate) or a heavy-duty cleaner like Krud Kutter
- Abrasives: 120-grit and 220-grit sandpaper, plus medium sanding sponges
- Fillers: Two-part epoxy wood filler or high-performance acrylic wood putty
- Surface Protection: Low-tack painter’s tape and heavy rosin paper
- Clean-up Supplies: Tack cloths and lint-free microfiber rags
Tools
- Screwdriver or cordless drill with adjustable torque clutch
- 2-inch angle sash brush (synthetic filament for waterborne formulas; natural bristle for oil)
- 4-inch high-density foam roller or microfiber mini-roller with a 1/4-inch nap
- Handheld sanding block or random-orbital sander
- Shop vacuum with a soft brush attachment
- Sawhorses or painter’s pyramids for elevated door drying
Choose the Right Paint and Primer
Cabinet surfaces require specialized coatings engineered to self-level, resist blocking (the tacky sticking between doors and frames), and tolerate repeated scrubbing.
Cabinet Paint
Standard wall paint remains too soft and scuffs easily under daily handling. Cabinets require trim-grade coatings engineered to cure into a rigid, protective shell.
Waterborne alkyd-urethane enamels are the industry standard for professional cabinet refinishing. They offer soap-and-water cleanup, low VOC emissions, and a smooth, hard finish that rivals factory spray applications. Benjamin Moore ADVANCE and Sherwin-Williams Emerald Urethane Trim Enamel remain top choices for professionals, with PPG Break-Through! widely used by spray contractors.
Acrylic latex enamels dry quickly and apply easily, but lack the impact and chip resistance of alkyd-urethane hybrids, wearing down prematurely near handles and edges.
Traditional oil-based enamels offer exceptional hardness and leveling, but they emit high VOCs, require mineral spirits for cleanup, and yellow over time—especially in kitchens with limited natural light. Strict environmental regulations have largely shifted residential applications toward waterborne alkyd technologies.
Sheen Choices
- Satin: Provides a subtle luster, hides minor substrate imperfections, and cleans easily.
- Semi-Gloss: The trade standard for cabinetry. It reflects light, resists grease accumulation, and tolerates aggressive cleaning.
- Gloss: Offers maximum durability and moisture resistance, but accentuates subtle brush strokes and surface defects. Pros typically reserve high-gloss for sprayed finishes.
Primer Selection
Primer creates an adhesive bond with the substrate and ensures uniform topcoat absorption.
Shellac-based primers (Zinsser B-I-N) deliver maximum performance over knotty wood, heavy grease, and high-tannin woods like oak, pine, and cherry. Shellac dries in roughly 45 minutes and bonds to glossy enamel, laminate, and hard-to-stick surfaces.
Oil-based primers (Zinsser Cover Stain) provide strong adhesion on raw timber, previously stained wood, and painted trim. They require mineral spirits for cleanup and longer drying periods than shellac.
Water-based acrylic primers perform adequately on bare MDF, but can raise the grain on unsealed natural wood, requiring an additional scuff-sanding pass before topcoating.
How to Paint Kitchen Cabinets in 9 Steps
1. Clear the Kitchen and Set Up a Painting Area
Empty all cabinet contents and clear countertops entirely. Move freestanding islands to maintain clear walking paths around drying surfaces.
Protect flooring, backsplashes, and appliances using heavy rosin paper or canvas drop cloths, securing all seams with painter’s tape. Cover HVAC return vents to prevent sanding dust from circulating through ductwork.
Establish a dedicated drying zone in a dry, ventilated area using sawhorses or painter’s pyramids. Maintain ambient room temperatures between 60°F and 75°F with relative humidity under 65% to ensure proper coating cure.
For homes built prior to 1978, test existing finishes for lead before sanding to comply with EPA Renovation, Repair, and Painting (RRP) safety guidelines.
2. Remove and Label the Doors, Drawers, and Hardware
Remove hinge screws using a manual driver or a low-torque drill setting to avoid stripping pilot holes. Remove drawer fronts, slides, and hardware.
Maintain strict door placement. Seasonal expansion causes wood doors to conform to specific openings; swapping doors leads to frame binding and uneven reveals.
Apply painter’s tape inside each door hinge cup and record a distinct index number. Apply matching numbered tape inside the corresponding cabinet box opening. Store screws, hinges, and plates in labeled bags. If upgrading to soft-close hinges ($3 to $8 per unit), replace hardware during this stage.
3. Clean Away Grease and Kitchen Grime
Accumulated cooking grease and body oils prevent paint adhesion. Inadequate cleaning accounts for the majority of coating failures.
Prepare a solution of TSP or a commercial degreaser like Krud Kutter according to manufacturer specs. Wearing protective gloves and eyewear, scrub all surfaces, frame edges, and profile grooves using an abrasive pad.
Rinse surfaces thoroughly with clean water and microfiber towels to remove residue, then allow surfaces to dry for at least two hours. Inspect corners and detailed profiles for remaining wax or grease, scraping stubborn areas with a plastic putty knife.
4. Sand and Repair the Surfaces
Sanding creates microscopic profile lines that allow primer to bond mechanically without needing to strip down to raw wood.
Scuff-sand all surfaces with 120-grit to 150-grit sandpaper to dull the existing gloss. Fill deep gouges, dents, and obsolete hardware holes using two-part epoxy filler or acrylic wood putty. Slightly overfill repairs to account for minor shrinkage during curing.
Once cured, sand patch areas flush using 220-grit paper. Vacuum frame edges, panel recesses, and door profiles using a soft brush attachment, then wipe all surfaces with a fresh tack cloth to remove residual dust.
5. Apply Primer and Let It Dry
Stain-blocking primer prevents wood tannins, resin, and oils from bleeding through the final finish.
Apply primer into profile details and panel joints using a 2-inch synthetic angle sash brush, laying down thin, controlled coats to prevent pooling. Immediately roll flat panel centers and frame faces using a 4-inch high-density foam roller in vertical, overlapping passes.
Maintain a wet edge and avoid re-working setting primer to prevent surface dragging. Shellac and oil-based primers dry to the touch in 2 to 4 hours, though complete solvent evaporation may require up to 24 hours based on site conditions.
6. Sand the Primer Smooth
Primer applications raise micro-wood fibers and catch ambient dust, creating a rough texture.
Lightly hand-sand primed surfaces using 220-grit sandpaper or a fine sanding block, applying gentle, uniform pressure to avoid sanding through to raw substrate. Inspect flat surfaces by hand to verify smoothness.
Vacuum generated primer dust and perform a final pass with a tack cloth. Skipping this step results in a gritty final topcoat texture.
7. Paint the Cabinet Boxes
Coat fixed face frames systematically, working from interior shelf edges out to the exterior face stiles.
Mask off wall margins and cabinet interiors using painter’s tape. Detail inside corners, frame joints, and narrow edges with an angle sash brush, then roll flat face frames immediately with a mini foam roller to eliminate brush texture and even out coverage.
Apply two light coats instead of one heavy application to prevent sags and runs along vertical stiles. Refer to the manufacturer’s label for specific recoat intervals, typically 4 to 8 hours.
Application Method Comparison
- Brushing: Offers precise control in tight moldings, but carries a risk of visible brush marks if the paint sets quickly.
- Rolling (High-Density Foam): Ideal for DIY application. Lays down a uniform, fine texture comparable to factory finishes without generating overspray.
- Spraying (HVLP): Delivers the smoothest factory finish, but requires precise paint thinning, proper safety gear, and extensive masking protection.
8. Paint the Doors, Drawer Fronts, and Shelves
Lay doors flat on sawhorses or painter’s pyramids. Horizontal drying allows enamels to self-level smoothly without running.
Coat the rear door faces first so any minor handling marks remain hidden on unexposed surfaces. Apply paint to profile moldings with a sash brush, then roll flat center panels. Allow door backs to dry for 24 hours before flipping to repeat cleaning, priming, and painting on front faces.
Apply a second topcoat to front faces following a light 220-grit scuff-sanding and tack cloth wipe. Keep the drying area enclosed to minimize air currents that deposit dust into wet enamel.
9. Let the Paint Cure, Then Reassemble Everything
Enamels dry to the touch in hours, but full resin curing takes significantly longer. Uncured paint remains vulnerable to denting and binding under pressure.
Allow finished components to rest undisturbed for 7 to 14 days before heavy use. Waterborne alkyd enamels require up to 30 days to reach full hardness and chemical resistance.
Reattach hardware manually to prevent over-tightening or damaging the new finish. Rehang doors and drawers according to assigned index numbers to maintain original reveal alignments. Apply clear silicone bumper pads to interior door corners to dampen contact and protect edges.
How to Get a Smooth Finish Without Brush Marks
Adding an alkyd extender (Floetrol for waterborne paints; Penetrol for oil-based formulas) extends open time, allowing brush and roller marks to level out naturally. Applying thin coats is equally vital: heavy applications skin over on top while remaining soft underneath, trapping texture within the film.
Work in manageable sections and avoid re-working paint that has been drying for longer than two minutes to prevent dragging the setting film. For optimal results, lay paint down with a foam roller and immediately “tip off” the surface by lightly passing a damp, high-quality brush over the wet coat in one continuous stroke. Lightly scuff-sand with 220-grit paper between every coat to knock down raised nibs.
Common Cabinet-Painting Mistakes That Ruin the Finish
- Omitting the Degreasing Phase: Trapped surface oils prevent paint adhesion, causing fisheyes or eventual peeling.
- Using Standard Interior Wall Paint: Wall paints lack the hard curing resins needed to withstand continuous handling, leading to early wear around knobs and edges.
- Losing Track of Door Locations: Mixing up doors during reassembly results in binding edges and uneven gap spacing.
- Painting Over Installed Hinges: Coating functional hardware gums up mechanical pivots and causes paint to flake off moving joints.
- Rehanging Doors Before Full Cure: Mounting soft, uncured doors causes the paint film to fuse to the frame, tearing down to the primer when opened.
How Long Does It Take to Paint Kitchen Cabinets?
A standard kitchen cabinet refinishing project requires 20 to 30 labor hours, typically scheduled across 4 to 7 calendar days to allow for proper cleaning, dry times, and multi-coat applications.
- Day 1 (6–8 Hours): Contents removal, hardware disassembly, degreasing, labeling, and surface masking.
- Day 2 (4–6 Hours): Scuff-sanding, surface filling, and primer application.
- Days 3–5 (8–12 Hours): Applying two topcoats to frames and door sides, observing required drying intervals.
- Final Day (3–5 Hours): Hardware installation, door hanging, reveal adjustment, and masking removal.
- Background (7–30 Days): Full coating cure period before aggressive cleaning or heavy impact.
How Much Does It Cost to Paint Kitchen Cabinets?
DIY Expense: Executing a cabinet project costs $180 to $600 in total supplies:
- Topcoat Enamel: $80 – $150
- Stain-Blocking Primer: $40 – $70
- Consumables (Sandpaper, Tape, Cleaners, Rollers, Brushes): $80 – $150
Professional Contracting Expense: Hiring a professional contractor averages $942 nationally, with most standard projects falling between $425 and $1,466. Larger kitchens with high door counts range from $2,800 to $3,200, while custom millwork sprayed off-site in high-cost metro areas can reach $3,000 to $7,000. Trade quotes are typically calculated at $30 to $60 per linear foot or $100 to $250 per door, with labor accounting for 70% to 80% of total job costs. Properly applied cabinet finishes deliver an operational lifespan of 8 to 12 years.
Frequently Asked Questions
Do You Have to Sand Kitchen Cabinets Before Painting?
Yes. Scuff-sanding creates the physical profile required for long-term topcoat adhesion. Even when using liquid deglossers or bonding primers, manual scuff-sanding ensures a dependable mechanical bond and levels existing finish imperfections.
What Type of Paint Is Best for Kitchen Cabinets?
Waterborne alkyd-urethane enamel combines the durability and self-leveling properties of traditional oil paints with the low VOC content, non-yellowing characteristics, and water cleanup of acrylic formulations.
Is Primer Necessary When Painting Cabinets?
Yes. Primer seals raw substrates, prevents tannin bleed, covers dark underlying colors, and creates a uniform bonding layer over existing cured finishes.
Can You Paint Cabinets Without Removing the Doors?
It is not recommended. Painting installed doors causes runs along lower profile edges, improper film thickness, paint bridging across hinge joints, and missed coverage along hidden door margins.
Is It Better to Use a Brush, Roller, or Sprayer?
A high-density foam roller combined with a fine sash brush offers the best balance of control and surface smoothness for DIY projects. Sprayers yield a factory-grade finish but require extensive containment, precise thinning, and professional application experience.
How Many Coats of Paint Do Kitchen Cabinets Require?
Standard applications require one coat of stain-blocking primer followed by two thin coats of enamel. Transitioning from dark stain finishes to light topcoats may require a third enamel pass to achieve complete color opacity.