Paint only sticks if it can form a mechanical bond with the surface underneath it, and that bond is easily ruined by things you can’t always see: dust, cooking grease, skin oils, and cleaning chemical residue. Any of these sitting on a wall acts as a barrier between the old surface and the new coat. Skip the cleaning step and even a good acrylic latex paint can start flaking, blistering, or peeling within a few months.
Every room dirties its walls differently. Kitchens pick up a fine film of cooking grease from the air. Bathrooms end up with soap scum and surfactant residue. Hallways collect skin oil and scuff marks from everyday traffic. Because the contamination is different in each case, the cleaning approach has to change with it, along with the paint sheen and the wall material you’re working with. Use a harsh chemical on a flat-finish wall, and you can tear the paper facing right off the drywall. Use a mild soap on heavy kitchen grease, and you’ll just smear it around, leaving a residue that paint won’t stick to.
Getting a clean, lasting paint job means looking closely at the wall first, picking the right cleaner for what’s actually on it, and using a method that lifts the dirt without soaking the drywall underneath.
Check the Condition of Your Walls Before You Start
Walk the room and look before you grab a bucket. Washing over a wall with active mold or structural damage doesn’t fix anything; it just spreads the problem and can damage the material further.
Distinguishing Between Dry Dust, Bound Grease, and Smoke Film
Loose dust settles on ledges and wall surfaces mostly from static charge, and it wipes or vacuums away without needing water. Grease is a different animal; it bonds chemically with the paint underneath, which is why you see it building up near stoves and heating vents. Smoke residue is worse still: it’s acidic, it yellows the surface, and it works its way into porous paint, so it needs a cleaner that neutralizes it or it will bleed straight through your new coat.
Identifying and Treating Mold or Mildew
Dark speckled patches in bathrooms, basements, or around window frames are usually mold or mildew, and regular detergent won’t take care of it; it wipes away the surface spores but leaves the roots intact inside the paint film. Treat any active growth with an antimicrobial cleaner or a diluted bleach solution first, and make sure it’s fully killed off before you move on to general prep washing.
Locating Peeling, Flaking, or Failing Coatings
Don’t wash over paint that’s already peeling; water gets under the loose edges and makes the failure worse. Take a putty knife and scrape back any unstable paint until you hit a solid, well-bonded edge before you introduce any water or degreaser.
Assessing Substrate Cracks, Stress Fractures, and Fastener Holes
Cracks, gouges, and sunken nail holes expose raw drywall paper, and wetting that paper makes the fibers swell and raise, which shows up as texture under your fresh paint. Patch these spots with joint compound or spackle, let them cure fully, and sand smooth before you clean the surrounding area.
Spotting High-Gloss and Semi-Gloss Surfaces
Glossy paint is too smooth for new paint to grip. Cleaning will take the dirt off, but it won’t touch the underlying sheen. If you spot gloss or semi-gloss surfaces during your walkthrough, plan on deglossing or sanding them right after cleaning.
Gather the Right Cleaning Supplies
The wrong cleaner can strip paint you want to keep, leave a residue film behind, or soften the paper backing on your drywall. Matching the product to the job matters more than people think.
Basic Supplies for Lightly Soiled Walls
- Mild dish detergent with non-ionic surfactants
- Warm water
- Two buckets: one for washing, one for rinsing, kept separate
- Soft, lint-free microfiber towels
- Non-abrasive sponges made for interior surfaces
Cleaners for Heavy Buildup and Hydrocarbon Residues
- TSP (trisodium phosphate) powder for cutting heavy grease and etching the surface
- Heavy-duty degreasing concentrates made for residential use
- Abrasive scrub pads, only on hard, non-porous gloss surfaces
- Liquid deglosser for slick, high-sheen finishes
Choosing Between TSP, TSP Substitutes, and Standard Detergents
TSP is a strong alkaline cleaner; it cuts through grease and dulls the surface slightly, which actually helps new paint grip better. The tradeoff is that its high pH can eat into delicate finishes, leave a chalky film if you don’t rinse it well, and it calls for gloves and eye protection. TSP substitutes use phosphate-free surfactants that cut grease effectively without the aggressive etching, and they’re a good fit for most modern interiors. Standard dish soap is fine for light upkeep on paint that’s already in good shape, but it doesn’t have the muscle for kitchen-grade grease or high-traffic areas.
Surface-Safe Tools for Paint Prep
- Extension pole with a flat microfiber mop head for high walls
- Shop vac with a HEPA filter and brush attachment
- Grit-free cellulose sponges that won’t drip
- Heavy drop cloths with a plastic backing to catch runoff
How to Clean Interior Walls Before Painting
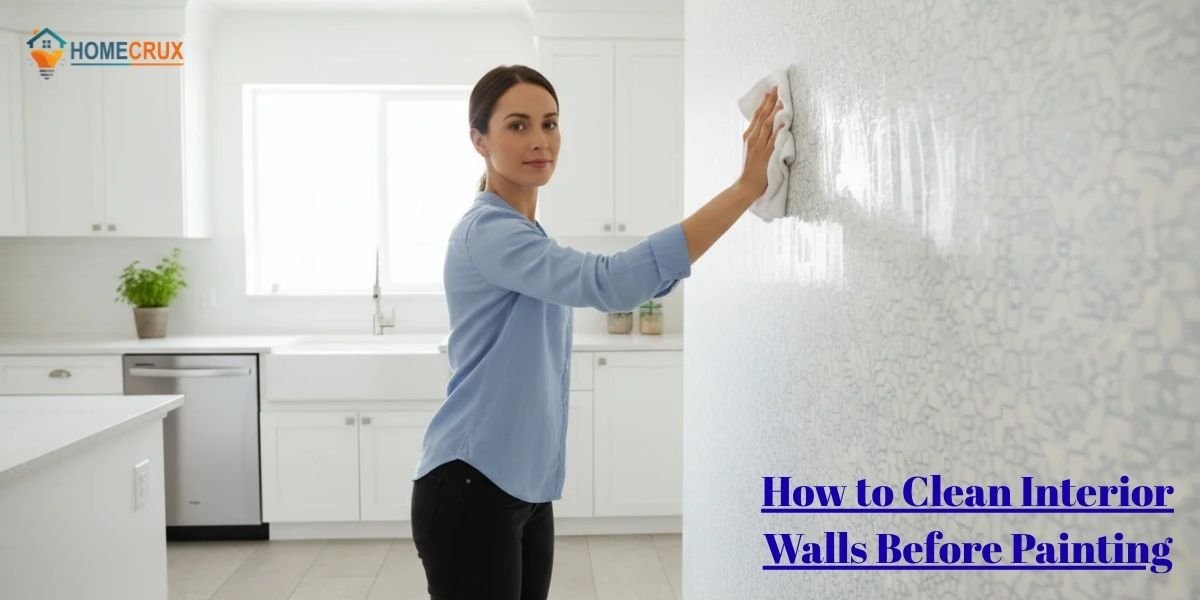
Work through these steps to strip off contamination, avoid water damage, and set the wall up for good paint adhesion.
1. Dry Dust Surface First
Never start with a wet cleaner on a dusty wall; the water turns the dust into a muddy paste that gets worked into the texture of the paint and drywall paper. Vacuum top to bottom with a soft brush attachment first, paying close attention to crown molding, baseboards, door frames, and corners, where dust tends to build up.
2. Wash From the Bottom Upward
Run liquid down a dry, dusty wall, and you’ll get streaking that’s hard to even out. Start at the bottom and work up in overlapping horizontal passes. That way, any drips run down over a surface that’s already clean and damp, instead of streaking dry dust.
3. Treat Heavy Stains and Grease Separately
General wall washing usually isn’t enough for grease spots, crayon marks, or scuffs. Deal with these individually instead of scrubbing the whole wall harder than it needs. Apply the cleaner directly to the spot and work from the outside edge inward so you don’t spread the stain.
4. Rinse Away Cleaning Residues
Soap, degreaser, and TSP all leave a thin film behind as they dry, and that film is enough to keep primer from bonding. Rinse with a fresh bucket of clean, lukewarm water and a clean sponge, and swap the rinse water out as soon as it clouds up.
5. Allow Complete Drying Before Painting
Paint over a damp wall, and you’re asking for trapped moisture, bubbling, and poor adhesion. Give the room 12 to 24 hours to dry fully. Fans and open windows speed this up considerably.
Choose the Right Cleaning Method for Each Room
Each room in the house builds up its own kind of grime, based on how it’s used, how humid it gets, and how well it’s ventilated.
Kitchen Walls
Cooking throws grease into the air, and it settles on the walls along with food splatter. Plain soapy water tends to smear this around rather than lift it off. Use an alkaline TSP substitute or a dedicated degreaser, and scrub well around the stove, backsplash, and upper cabinets, where vaporized oil tends to harden.
Bathroom Walls
Soap scum, body oil, and moisture leave surfactant rings on bathroom paint, and the humidity makes mold an early problem too. Use an antimicrobial cleaner or a bleach solution diluted one part bleach to four parts water, and pay extra attention around the shower, behind the toilet, and near the vanity mirror.
Living Rooms and Bedrooms
These rooms mostly deal with loose dust, pet hair, and handprints near switches and doorways. Vacuum first to clear the loose stuff, then spot-clean marks with a diluted mild soap solution. Go easy on the water here, especially if the walls are painted in a matte or flat finish.
Laundry Rooms, Garages, and Utility Spaces
These spaces collect dirt, lint, exhaust residue, and detergent overspray. A strong TSP mix and a stiff nylon brush handle this well. Check the drywall for moisture before painting, since these areas often run damper than the rest of the house.
Different Wall Finishes Need Different Care
How aggressively you can clean a wall depends on the sheen of the existing paint.
Flat and Matte Finishes
Flat and matte paints carry more pigment and less binder, so they’re more porous and soak up liquid fast. Scrub them with a rough sponge or a strong chemical, and you’ll wear through the paint and damage the paper underneath. Stick to light water use, mostly dry vacuuming, with a damp microfiber cloth for spot cleaning.
Eggshell and Satin Finishes
Eggshell and satin hold up better to a wet clean, but scrub pads can burnish them and leave shiny patches behind. A soft sponge, light pressure, and mild detergent are all you need.
Semi-Gloss and Gloss Finishes
Gloss and semi-gloss are non-porous, so you can wash them fairly aggressively without hurting the paint. The catch is that the same smoothness works against you when it’s time to repaint; there’s no texture for new paint to grip. Clean with an alkaline degreaser to cut the oils, then sand or chemically etch the surface to give new paint something to hold onto.
Stains That Need Extra Attention Before Painting
A general wash handles everyday dirt, but certain stains will bleed through a fresh coat if you don’t deal with them separately.
Nicotine and Tobacco Smoke Stains
Nicotine leaves a sticky, yellow-brown film that dissolves right into water-based paint and bleeds through more than one coat. Scrub it with a concentrated TSP solution to pull out as much tar as you can, let it dry, then seal it with a shellac- or solvent-based stain-blocking primer before painting.
Crayon and Wax Deposits
Wax keeps water-based paint from wetting the surface evenly, so it beads up and won’t adhere. Scrape off what you can with a plastic blade, then wipe the rest with mineral spirits or isopropyl alcohol to dissolve the residue. Seal the spot with a stain-blocking primer.
Marker and Permanent Ink
Permanent ink dye leaches straight into fresh latex paint. Dab. Don’t rub, the mark with 99% isopropyl alcohol on a clean white cloth to lift the dye without spreading it, then prime over it with a shellac-based stain blocker.
Water Stains and Tannin Leaching
Water stains leave mineral deposits that will dissolve right into a water-based primer or topcoat. First fix whatever’s causing the moisture, then wash away any loose salts on the surface. Let it dry completely and seal it with an oil-based or shellac-based stain blocker.
Should You Sand the Walls After Cleaning?
Cleaning removes the dirt; sanding gives the surface the texture paint actually needs to grip. Doing both gives you the best base to paint on.
When Sanding Improves Adhesion
Sanding scuffs microscopic grooves into the paint, which gives new paint more surface area to bond to. Sand any glossy, semi-gloss, or enamel surface, and any spot with flaking edges, rough patches, or joint compound repairs.
When Sanding Isn’t Necessary
If the wall is clean, dry, already in a low-sheen finish like flat, matte, or eggshell, and free of flaking or patch repairs, you can usually skip sanding altogether.
Removing Sanding Dust After Cleaning
Sanding kicks up fine gypsum and paint dust that settles right back onto the wall. Paint over that dust and you’ll get poor adhesion and early peeling. Vacuum thoroughly after sanding, then wipe down with a slightly damp microfiber or tack cloth to catch what’s left.
Common Wall Cleaning Mistakes That Affect Paint Adhesion
- Painting over damp walls: Trapped moisture causes bubbling, blistering, and peeling.
- Leaving soap residue behind: Skip the rinse, and you leave an invisible film that breaks the bond between wall and paint.
- Skipping the dry dust step: Wetting a dusty wall turns loose particles into mud that dries into the surface.
- Scrubbing low-gloss finishes with abrasive pads: This tears the paint film and can damage the drywall paper underneath.
- Soaking paper-backed drywall: Too much water swells the gypsum core and causes the paper to bubble or warp.
- Ignoring heavy grease: Paint won’t cure properly over grease, leading to slick, weak spots.
- Using bleach undiluted: It kills mold and strips color, but leaves salts behind that interfere with paint curing if not rinsed out.
- Painting too soon after washing: Not giving the wall enough time to dry traps moisture and weakens the primer bond.
How to Tell When Your Walls Are Ready for Paint
Four simple checks will tell you if the wall is genuinely ready.
The Surface Touch and Temperature Test
Run your hand along the lower wall and the corners. It should feel dry and be the same temperature as the room. A cool spot usually means there’s still moisture evaporating underneath.
The White Cloth Residue Check
Wipe a dry, dark microfiber cloth firmly across the wall. If it picks up white dust or chalky residue, go back over the area with the vacuum and a final wipe before painting.
The Water Drop Adhesion Check
Flick a few drops of water onto the wall. If they bead up right away, there’s still grease or gloss on the surface. If they flatten and soak in slowly, the wall has enough texture and is ready for paint.
Verifying Fully Cured Wall Patch Repairs
Check any patches made with joint compound or spackle. They should be fully white, hard, and smooth — no dark or soft spots, which mean they’re still wet underneath. Sand patches flush and prime them before the topcoat goes on.
Conclusion
A good paint job comes down to good prep, full stop. Taking the time to inspect, wash, patch, and dry your walls properly gives primer and paint a surface they can actually bond to.
Match your cleaner to the room, deal with stains before they become a problem, and confirm the wall is dry before you pick up a brush. That extra effort up front is what keeps a paint job from peeling, blistering, or wearing thin before its time.
Frequently Asked Questions
Do I always need to wash walls before painting?
Washing matters most in kitchens, bathrooms, and hallways, anywhere grease, body oils, or heavy foot traffic build up. A bedroom or ceiling with sound, dust-free paint might only need a good vacuuming.
Can I use vinegar to clean walls before painting?
Vinegar is fine for light water spots, but it won’t cut through grease, and its acidity can leave residue that interferes with some paint formulas if it isn’t rinsed off well. An alkaline cleaner or TSP substitute is the safer bet for anything heavier.
Is dish soap enough to remove grease before painting?
It handles light dirt and minor oils fine, but it won’t touch cooked-on kitchen grease or smoke film. Those need an alkaline degreaser, or TSP substitute to get the surface ready for paint.
How long should walls dry before applying paint?
Give it at least 12 to 24 hours under normal room conditions, around 70°F and 50% humidity. Higher humidity, cooler temperatures, or a more porous wall surface can mean waiting longer.
Do I need to rinse walls after washing them?
Yes. Skipping the rinse leaves behind detergent and alkaline residue that forms a thin film, and that film is enough to stop new paint from bonding properly.